Tag Archives: sami knife

Roman Kislitsyn: Sami Style Carving WIP

In celebration of post number 100 on Nordiska Knivar I would like to present a special piece that has been in the planning stages for sometime.

I have presented the knives of Roman Kislitsyn on these pages before (Roman Kislitsyn) and I was in awe of his work. I asked him where he learned how to make Sami style knives with such beautiful and intricate carving. He told me he was self taught and some of what he learned was from Nordiska Knivar.

I asked him if he would consider doing a work in progress post to show a work in its various stages and he graciously agreed. I hope you will enjoy this post as much as I do.

Thank you very much to Roman for taking the time to do this for Nordiska Knivar!

Please visit his blog at Roman’s blog (girvas.blogspot.ca)

Sami style carving my way by Roman Kislitsyn

First of all, a disclaimer: This is how I do carving. I learned it all myself using information from the internet and by no means it is the only way or even this is right way to do Sami style carving. But this works for me.

The hardest question to answer about carving is “How do you come with the patterns, where can I learn it?” This question has no answer. Or, more precisely, every maker has his own answer.

I grew up in the Kola region, north-west Russia. This land used to belong to Sami people for hundreds and thousands of years. Very few Sami people were living there by the time my family moved up north, but most of the topographic names came from Sami language and they always sounded like a mystery to me. I never had Sami friends, but grew up with the music of the names of mountains, rivers, and lakes: Kukisvumchorr, Aikuaivenchorr, Tuliyok, Kaskasnewyok, Chudzyavr, Pyatnyavr…I was fascinated by these long words and their secret meaning. I like to believe that this helps me to see the beauty of Sami carving patterns and helps me to create my own combinations of traditional design elements. I also get inspiration from seeing other Sami crafts, jewelry, tools, and, of course, Sami knives.

I try not to copy other people’s work, but rather learn new elements and patterns, try to draw them in different combinations and see what works and what doesn’t.
I like to go out and sit on the lake shore or on the top of the hill and look at the Nova Scotia landscape which reminds me of places where I grew up, and this also helps to come into right mood and I often come up with ideas this way.

In my work I mainly use traditional materials like reindeer antler and all sorts of figured birch, but I like to experiment with other woods as well. If you ask me what is my favorite wood, it’s probably a birch burl. I used this wood for my very first knife and I was fascinated by the deep three dimensional structure of this wood. And even now, a quarter century later I still find it very attractive.

As to the reindeer antler, many people believe that it is best if it’s white or almost white, like ivory. I think that plain white is rare, but boring. Antler has many subtle tones and colors which are beautiful and which create a unique pattern on each piece…but let’s get to business.

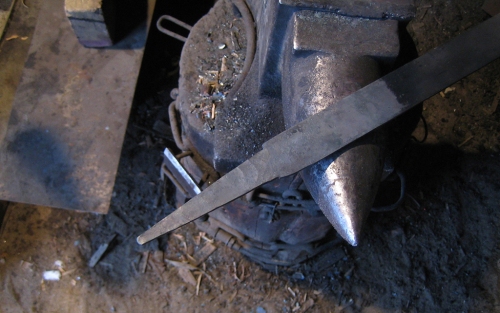
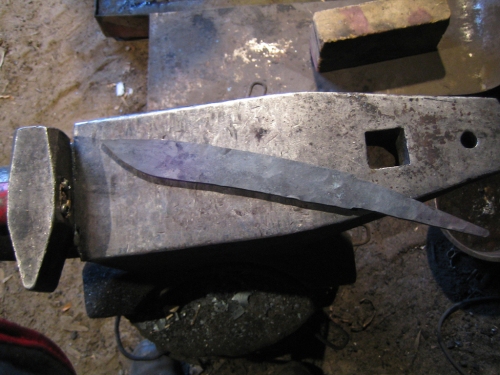
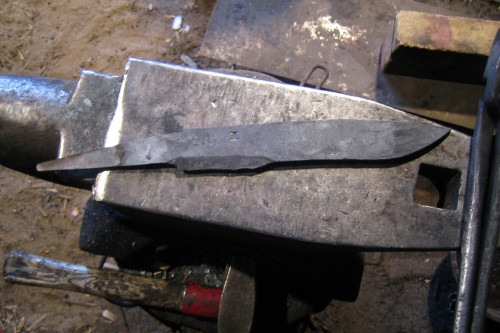
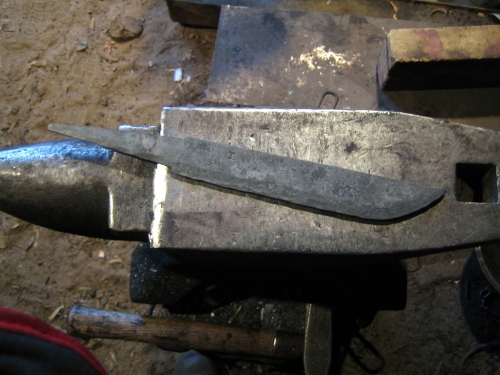
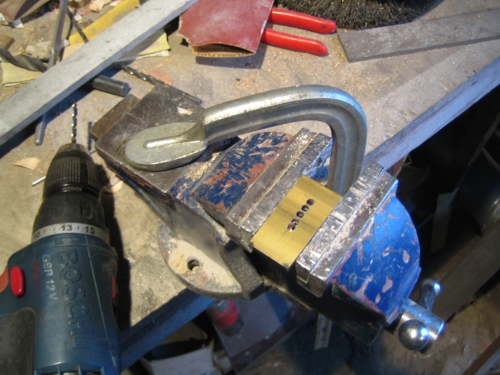
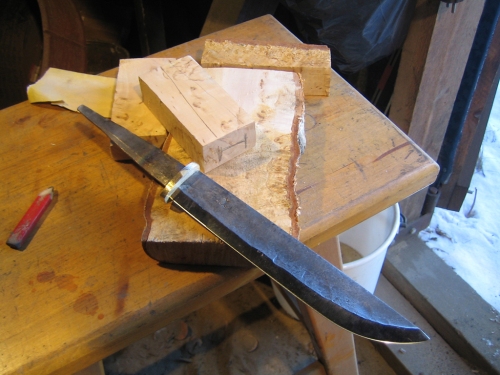
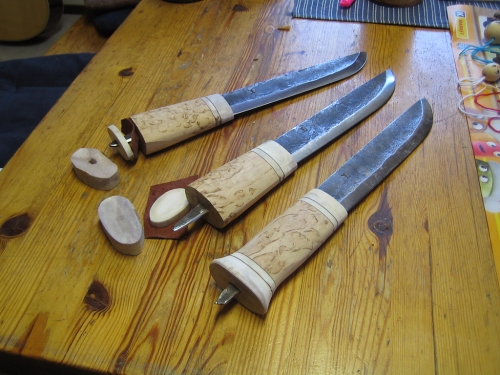
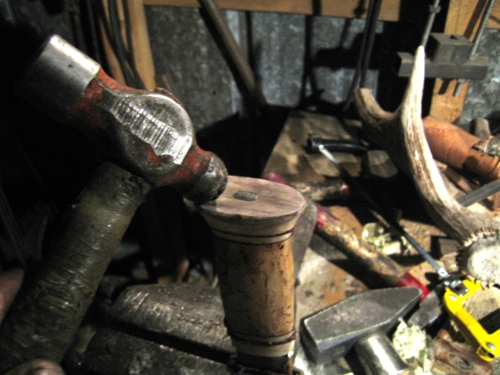
This tutorial is about Sami style carving on reindeer antler, not the whole knife making process, so the first few photos briefly demonstrate building of the knife, then I show my carving tools, and then explain process of carving.

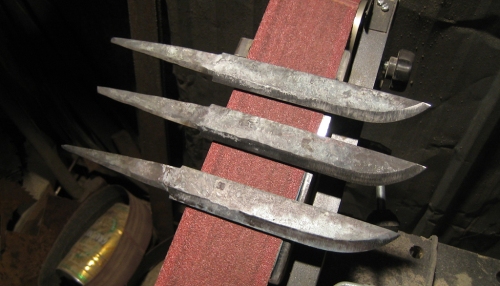
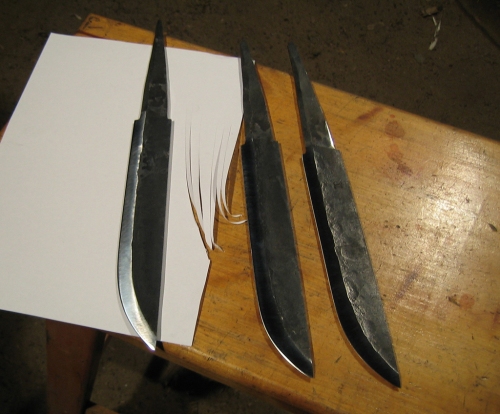
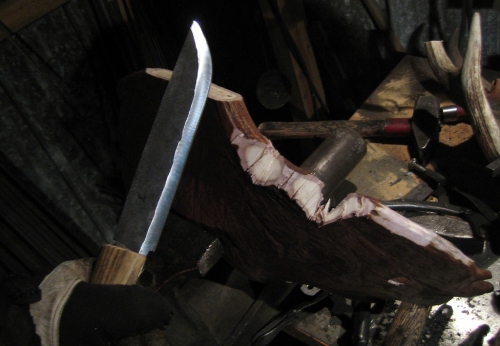
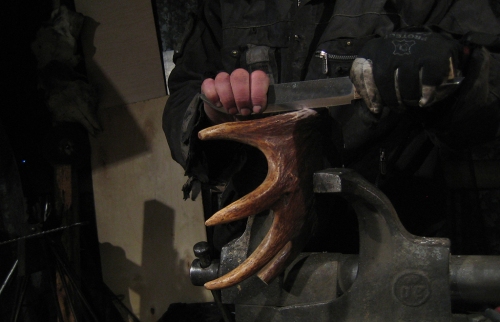
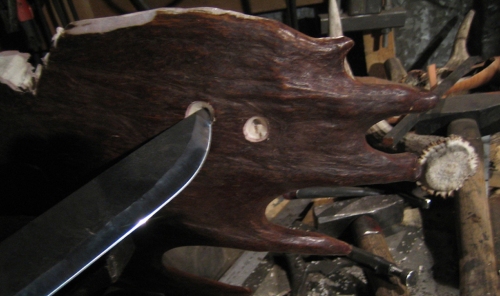
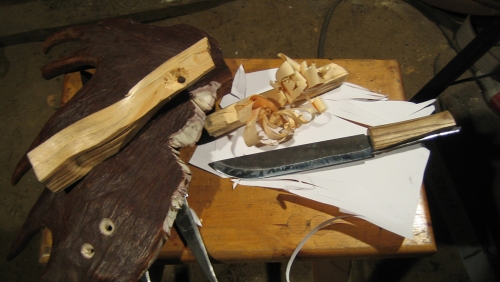
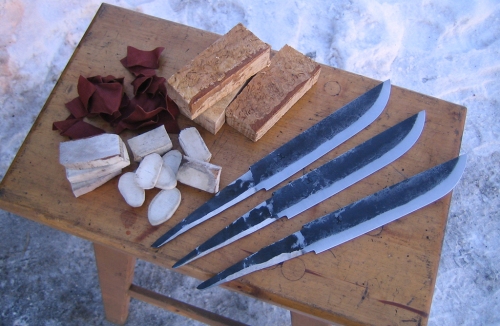
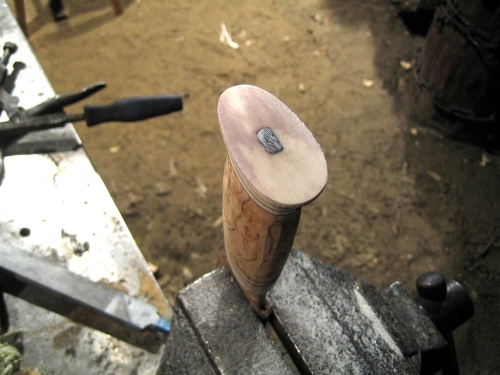
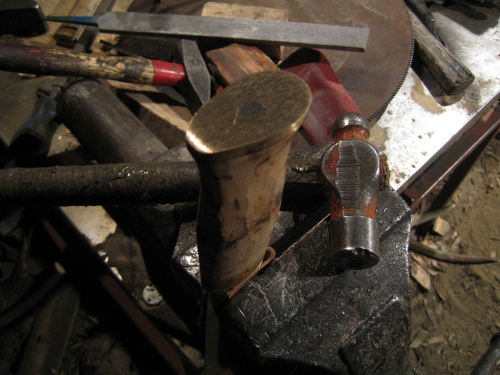
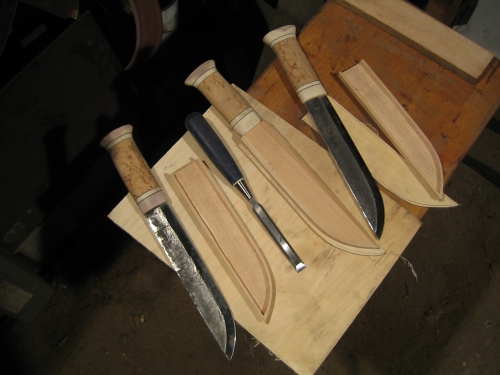
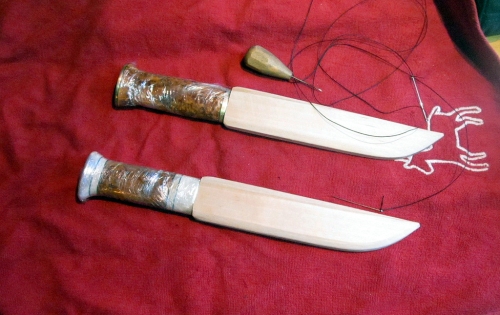
Everything begins with selection of blade and materials. By this time I usually have an idea of what this knife will look like. Often I draw a sketch, but over time I figured that the pattern from original sketch rarely looks good on the real knife. So I just roughly draw an idea and then, when the knife is ready for carving I draw on it and see what pattern looks good. Anyway, here are a few photos of how knife is made.

knife-1

knife-2

knife-4

knife-5

knife-6

knife-7

knife-8

knife-9

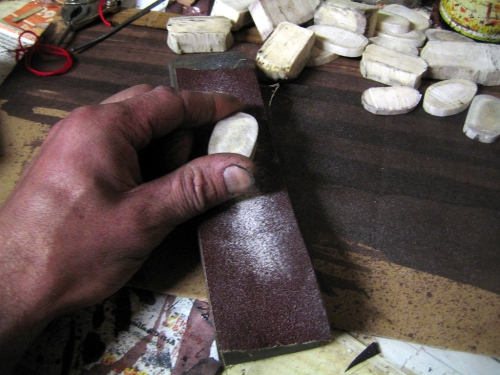
On the last photo both handle and sheath are sanded down to 2000 grit and buffed with velvet wheel on my Dremel. This makes the antler surface very smooth and even tiny defects become clearly visible. If small scratches are not completely removed they can pop up after paint is applied and then it’s too late to get rid of them. Also wooden parts are stained and covered with two or three layers of teak oil. Now I’m ready to draw the pattern. After few experiments I come with the pattern I like.

I take a photo at this stage and in a future I use this photo as a reference because pencil lines get erased easily from the smooth surface of antler as I start carving.

carving-1

Now it’s time to say “damn! I forgot the rivets!” Believe it or not but by this time I get so excited to start carving, that I forget about rivets in about 50% cases. Ok, rivets are installed and filed flush with the surface, everything is sanded down to 2000 grit again and NOW I can finally start with carving. Since it will be two colored pattern, I first draw and carve main lanes for the black part.

carving-2

Here is my carving knife. This is my main tool which I use for pretty much everything except for round dots. To make dots I use an awl. I made this knife from a flat lathe blade using my Dremel tool. I think it’s called parting blade, but I’m not sure.

carving-3

carving-4

The carving knife needs to be very sharp and I hone it before each session with 1000 grit wet stone and green polishing compound. I also hone it with green compound after each 10-15 minutes of work or if I feel I need to.

carving-5

Carving technique is very simple. Everyone who carved his or his girlfriend’s name on a tree or on the neighbor’s fence knows how to do it. Basically I hold a knife like a pencil and drive it with one hand, while pushing it with a thumb of the other hand and holding the work with all free fingers. This way I carve along a line…

carving-6
…and then carve it back along same line removing tiny amount of material and forming a V-shaped groove. This way I carve all the lines. To make thicker lines I hold a knife at lower angle to the antler surface. To make thinner lines I keep a knife more vertical. It is very important not to push too deep. Grooves need to just a fraction of millimeter deep.

carving-7

To make little triangles I use a different technique. Line forms a base of triangle, then I take my carving knife like an awl and with one push I make a cut from the bottom of triangle to the top. This is a deep cut with a corner of the knife. Then I turn backwards and make same deep cut from the top down to the base. If everything is done right, I get a nice triangular hole.

carving-8

carving-9
After the carving is done I carefully check it and clean all corners. Then I lightly sand everything with 800 grit paper. If I’m doing one color, I would sand it to 2000 grit again. But this time I’m doing 2 colors and will have to sand it again after the second session of carving. So, I will sand it to 2000 later.

carving-10

Then I thoroughly paint everything with artistic oil paint.

carving-11

And thoroughly wipe it off.
carving-12
Do same with the knife handle.
carving-13

carving-14

After paint is dry I thoroughly (you probably noticed by now that all the paint stuff need to be done thoroughly) rub all black lines with the candle to cover them with paraffin. ThenI wipe paraffin from open areas, draw and carve brown lines.

carving-15

carving-16

For some reason artistic oil paint does not come in brown color. Instead it comes in a bunch of colors like Van Dyke brown (which is rather black to my eyes), or burnt sienna(which I think is rather dark roast color). So, I figured that to get a brown color I like, I mix 1:1 Van Dyke brown and burnt sienna, and then add a bit of white until the resulting color is light enough. Then (yes, that’s right!) I thoroughly paint all brown lines and clean excess of paint. Ta-da!!!

carving-17

carving-18

carving-19

After brown paint is dry it’s time to remove protective layer of paraffin from black lines. I carefully warm it up on the stove until paraffin starts melting and thoroughly wipe it off with clean soft rag.
All I have to do now is to stitch and dye the leather top for the sheath.
And here is a final result:

Sami_for_AS-1

Sami_for_AS-2

Sami_for_AS-3

Sami_for_AS-4

Sami_for_AS-5

Sami_for_AS-6

Roman Kislitsyn

I would like to feature the work of Roman Kislitsyn this month. I have seen his knives at Britishblades.com where he goes by the name Abyrvalg. Roman is a native of Apatity, Murmansk region, Russia who now lives in Halifax, Nova Scotia, Canada. He grew up around Sami design and has returned to it as the influence on his beautifuly crafted knives. He claims Igor Barutkin as one of his influences, they are from the same region and Igor was the first smith I profiled on this blog over three years ago:

https://nordiskaknivar.wordpress.com/2012/05/28/igor-barutkin-knives-of-the-lappish-pures-20/

I am very fond the Sami style knives, I like the richness of them, the tradition they evoke, the high level of skill they exhibit. They are a very basic tool meant to be used but a wonderful piece of art and design. If you would like to visit Roman’s blog go to http://girvas.blogspot.ca/  Thank you Roman!

Roman

Roman Kislitsyn:

“I made my first knife when I was 15 or 16 years old. It was a simple blade on the birch burls handle and a primitive leather sheath with wooden insert. Nothing fancy, but I loved it and I was incredibly proud of myself. This is how I fell in love with knife making. As a kid and teenager I always liked crafting things. I was fascinated by turning some rough piece of wood or other material into useful (and sometimes even nice looking) thing. In the middle school this interest brought me to the wood carving class where I learned how to use carving knives, chisels and gouges. So, knife making became my hobby, but after making a few knives I had to stop for a while as I went to university and then started my career. I came back to knife making only a few years ago.

Scandinavian knives were always my favorite of all types of knives. I especially like Finnish puukkos. But a few years ago when surfing on internet I came across images of Sami knives. It wasn’t new for me as I used to live in the Russian part of Sami land, but it was like a discovery of long forgotten thing. I was stunned with the carving patterns and I started to search for the information. Very quickly I found photos of knives made by Igor Barutkin, a knife maker from same region where I grew up.

It was like a sign for me. I realized that I’ve got to try even though I will never be as good… And I did try. This is when my wood carving lessons came in useful. But carving on antler appeared to be much more difficult than on wood, and I had to learn a new technique. By this time I was already living in Canada, so there were no carvers to learn from near me. I had to search information on internet and I came upon a few nice tutorials on youtube, britishblades.com, and Russian knife makers forum zadi.ru. This is how I learned basics of carving. And I still keep learning…

I like hiking, fishing, and hunting. As an outdoor person I use knives a lot and my knife making philosophy is that a knife has to be a reliable and useful tool, no matter how nice it looks. This is a second reason why I love Sami carving on knives (with first being a simple beauty of Sami carving) – the more carving, the better grip. All my knives are supposed to be used hard and I love to see them being used. The other thing is that I don’t like to use power tools for knife making. I only use hand drill and sometimes Dremel tool. My main tools are rasps, files, sand paper, and off course carving knife.

For now I don’t have a workshop where I could set a forge and grinder(s), so I have to buy blades from other people. But in a future I would love to learn hand forging, and may be get my own forge. I also feel I still have a lot to learn in terms of antler carving. And brass work. And leather work. See, this is why I love knife making – there is always something to learn…”

DR_leuku-7

DR_leuku-2

Roman

Roman 3

Roman 2

Roman 4

R1a

R1

R2

R3R5

R6

R7

R8

R9

R10

R11

R11a

“I really like the look of Osage orange cross-section and I had this piece of Osage orange trunk that was a bit to small in diameter to use for a handle, so I tried to tailor something useful and, hopefully nice looking, from it…
Blade is hand forged by Nova Scotia bladesmith Randal Graham. He made it from modified 1086 steel with addition of vanadium.”

R22

R18

R13

R14a

R14

R15

R15bR15a

Roman makes jewelry too...

Roman makes jewelry too…

R19 R21 R20

Pasi Jaakonaho

 Pasi Jaakonaho is a puukkoseppämestari– a master smith, and teacher  in Inari in Northern Finland, whose beautiful traditional knives evoke the spirit of the north. He is a craftsman who also works in wood and antler and makes silver jewelry.  I hope you’ll enjoy this post, you can visit his website at    http://www.pasijaakonaho.fi/linkit.htm to see more of his work or to contact him.

Pasi Jaakonaho:

“I got the first push towards handcrafting in 1993, when I left to go Inari in northern Finland to study as artisan. One of the areas of studies was puukko making. It was mainly about making traditional Sami puukkos. In my close family I don’t have craftsmen in particular, except Juho Jaakonaho who was well known maker of wooden skis. I was born in Pohjois-Pohjanmaa (northern Ostrobothnia), in small place called Oksava of Haapajärvi. It is a rural area, and it was normal there, that in every house they did some handcrafting.

 I worked as full time knifesmith in 2001-2004. My shop in Simo was built in 1920.  My main product were puukkos and puukko blades. I did a little bit of of other forging work too and also I worked with bones and antler, wood and burl. Also I made some fishing lures.

Most part of learning I learned from making the puukkos, but I also had many teachers. To mention: Ilmari Laiti, Arto Saijets, Kari Pakarinen, Heino Tuomivaara. Currently I work in Inari in the Sámi Education Institute teaching forging, stag/woodworking and silverwork. www.sogsakk.fi Making puukkos is kind of a side-job. I have made more and more silver jewelery lately.

 My philosophy in making puukkos and other handcrafts is to enjoy doing it. One of the most fascinating stages of making a puukko is forging the bar of steel into a blade shape, the way the steel transforms. In handcraft generally I appreciate the skill to work with different materials: how you can make a butter-box from a piece of birch or how the stag or a bone transforms into a part of knife’s sheath – how stag can be engraved. Of course I also wish, that my work would not stay in my possession, but that people have them and so it is nice to do new works and to improve.”

Pasi Jaakonaho

Pasi Jaakonaho

1p

15p

16p

puukko1_p

ullan_kuksa_1

voirasia_p

Making A Leuku by Pasi Hurttila

I am pleased to be able to present this work in progress piece by Pasi Hurttila. He has written about the leuku for this blog and his work has been shown here before. (See Index Page) I admire Pasi’s work,  especially  his leukus. They are of traditional design and executed to the highest standards of craftsmanship. They are not only very fine tools, they are works of art. I’m able to say I own one of Pasi’s leukus with moose antler fittings and it is one of my most prized possessions.

For Pasi’s article about the leuku go to:  https://nordiskaknivar.wordpress.com/2012/10/20/leuku-part-two-by-pasi-hurtilla/

Pasi Hurttila’s work can be found at Lamnia.fi:  http://www.lamnia.fi/items.php?lang=en&gid=1&mid=354

Also, visit his website: http://www.hurttilanpaja.suntuubi.com/

Thank you Pasi for allowing me to publish this work in progress piece!

Pasi Hurttila:

“This work in progress follows the making of my two leuku models, one with brass and curly birch, and the other with elk antler and curly birch.

The blade starts its life as a bar of 80CrV2 carbon steel. Heating is done in a charcoal forge and all forging is done with a hand held hammer. (I forge 22cm leuku blades from 34x5mm bar.)

1

Tang forged.

2

The blank is cut off and the shape of the blade is forged. The spine is left curved downwards, to give compensation for bevel forging.

3

Spine straightens out as forging of bevels goes on.

4

Bevels are forged in, tang and the whole blade is straightened, and bevel forging is finished. Blade is normalized and left to cool buried in ashes on the side of the forge.

5

Blades are roughly ground before heat treating, then hardened by quenching in oil, and tempered twice.

6

Blades sanded, sharpened, and polished.

7

Several tests are done on each blade, on elk antler and wood. Batoning, chopping, carving, scraping, and drilling with the tip. After testing blades get final polishing.

8

9

10

11

Materials for moose leuku; antler, curly birch, leather spacers. Antler bits are always cut about a week before making the handles, as usually antler shrinks a bit after it’s cut in pieces and the surface is sanded.

13

Antler bits are flattened and leveled on a piece of sandpaper.

14

Fitting is done by a drill and needle rasps.

15

All parts of the handle are fitted and roughly shaped before gluing.

12

21

16

Parts are assembled on the tang, with the glue in. Handle is tightened by peening, no press used. Peening is done so firmly that any parts won’t move when glue is still open. Peened end of the tang is filed down.

17

18

When the glue has set, handles are shaped with coarse grit. Securing screws are added and heads are sanded down. Final sanding of the handle is done.

22

19

Birch wood liners are made by using a hand saw, knife and chisel, finished by sanding.

20

Handles of brass and curly birch are soaked in boiled linseed oil overnight. On handles with antler parts the oil is brushed several times on wooden parts only.

23

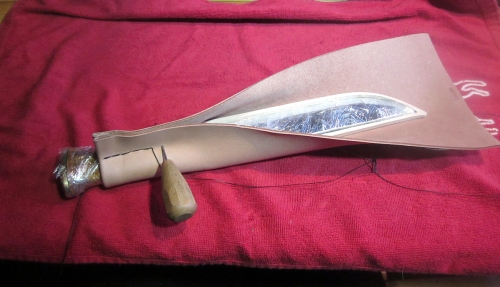
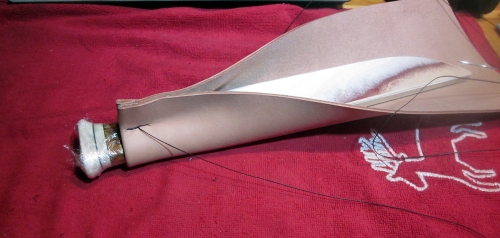
Sheath making begins with taping the edge of the blade and wrapping knife in plastic wrap.

24

A rectangular piece of leather is cut, mouth part is thinned and folded. Leather is soaked in water to make it soft, and stitching starts from the mouth.

25

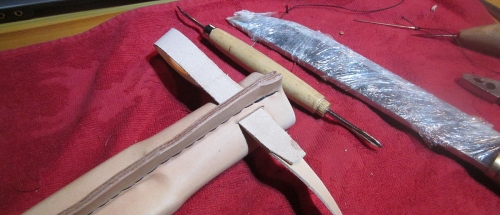
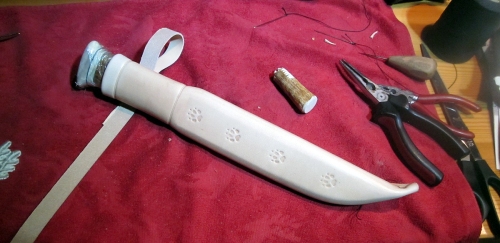
After the sheath has dried for a while, knife is pulled out, belt loop holes are cut, and knife is sheathed again with a belt loop strap on the place. Leather is smoothed with a bone spatula, and decorations are embossed.

26

27

Seam is glued and trimmed, Sheath is dyed and waxed. Knife gets final polishing, some wax on the handle, and it’s ready to go.”

28

29

Here are a few photos of the leuku Pasi made for me.

November 2013 023

November 2013 024

November 2013 028

November 2013 029

November 2013 025

November 2013 026

Pasi's mark.

Pasi’s mark.

© Pasi Hurttila  2013

Leuku: Part Two by Pasi Hurttila

One makers thoughts on leuku, “stuorra niibi”, a large saami type knife by Pasi Hurttila

“For most Finnish people the word leuku brings immediately a large Lappish knife to mind. That’s correct, as that is what a leuku is, a large knife originally from northern parts of Scandinavia. Clear characteristics of a leuku are full pommel, straight handle, relatively high blade which is not really pointed and not tapering lower in height towards the tip. Spine can be straight or bit curved/drop point.

Some people are really strict on what is a leuku and what’s not. For me it’s clear, if I see a knife I can tell immediately if it’s a leuku or not in my opinion. There are not any exact standards on that. For example I’ve seen a picture of full-tang leuku made by Pekka Tuominen, and for me that clearly can be called a leuku, even if there’s no historical example found like that. Tradition itself is an on-going thing, it doesn’t stop on some certain age, even leukus and their design can still get some new winds in the design. Without forgetting the tradition of course.

Of leukus size and style you can see that it’s clearly meant for hitting. Also it served as a kind of all-rounder, tasks varying from splitting and batoning wood to skinning and gutting animals, all-round camp knife. Saami people also had a smaller knife, “unna niibas”, the size of a common puukko, for smaller tasks like whittling etc. So a leuku clearly hasn’t been a whittler or a carver, which can be seen already by the size of it.

Traditionally materials used on leukus were wood (birch or sallow), reindeer antler/bone and reindeer hide. Blades were made out of any suitable carbon steel that could be found. Brass was used on bolsters and rivets if available. Blade length could vary from 15 up to 24cm. Usually blades have been relatively thin, less than 4 mm. A thin blade was enough for cutting timber of tundra area. Grind types varied too, depending what maker thought was useful.

Decorations and amount of them varied among the makers. Some preferred more of them, and some were even specialized in bone carvings. But the same goes with leukus as with all types of knives; there are really decorated collectors items, simple everyman users, and everything between.

Nowadays handmade leukus and blades vary a lot from each other. Thickness can be from 3 up to 6mm. Grinds can be almost any types, from convex to scandi, with possibly secondary bevels. And as well as in history, some makers do really beautifully carved ones, and some make simple style users. All materials can be used, from reindeer antler to kydex, a leuku is still a leuku.

In northern Lapland, where I live, leukus can be seen in use still. But most likely on the waist of a woodsman you’ll see a smaller puukko, with 10cm or shorter blade, accompanied with an axe in a backpack. But anyway it’s pretty common to see people carrying leukus still here, especially in winter time.

I personally use leuku in several tasks. In willow grouse trapping in winter time, you need to cut lot’s of birch twigs when setting traps, and that’s where a leuku is really useful. In cleaning large fresh or dried hides a larger blade is useful too. Also in pruning and barking poles etc.

My ideal leuku is pretty basic user; curly birch handle with brass bolsters, about 5mm thick blade in 20-23cm lenght. 26-28 degree scandi grind with small secondary bevel,  basic high leather sheath with traditional type choking belt hanger. 5mm thick blade gives bit more power, which is needed in batoning and splitting. Adding of course the weight a bit, but like in many things: to gain something is to lose something. All compromises.

After all a leuku has something what every good item must have; a soul. For me it gives an image of old times, wilderness, living in nature, Lappish scenery etc…. which all have a meaning for me too in one way or another.

Like I wrote in the beginning, some thoughts on a leuku. Exact historical things and knife details I leave for them who have studied them and know them better than I do.”

Here are some of Pasi’s  leukus made at his shop in Ivalo, Finland. To see more of his work please visit his website at: http://www.hurttilanpaja.suntuubi.com/?cat=1

The first leuku was made for me by Pasi and shows his very high degree of skill and craftsmanship. This is a beautiful leuku that rises above just being a knife or a tool and definitely has the “soul” that Pasi speaks of.

Hurttila Leuku

Hurttila Leuku 2

Pasi Hurttila

Leuku: Part One

The leuku is a traditional knife of the Sami culture of Lapland, it is also called “stuorra niibi” which means big knife. I will be making two posts about the leuku, the first one with a brief description, some photos and an account of his experience with the leuku by Thomas (edgepal)  from Northern Sweden. The second post is an excellent essay written by Pasi Hurttila, a puukkoseppä from Ivalo, Finland.

In my correspondence with Federico Buldrini he states “It’s believed that leukus were developed by Sami people, starting from the Viking seaxes and väkipuukkos (in Finland). These knives, together with steel working techniques, arrived in Scandinavian and Baltic peninsula after the Migration Period, 400-700 A.D.” and the leuku has evolved to suit their needs, from chopping down small trees, clearing brush and splitting firewood to butchering and preparing reindeer.

The leuku has a wide blade about 8 or 9 inches long usually of carbon steel which holds up better in the cold climate. The handle is generally birch with a wide flat pommel at the end that gives added force when struck with the free hand. It also helps in taking the leuku out of the sheath with gloves or mittens on.

Sometimes a small piece of bone may be inserted in the handle as a rattle, a measure to keep evil spirits away. The bolsters are brass and the tang extends all the way through the handle. The tuppi or sheath is leather, usually from reindeer and is very deep covering almost all of the knife. There may be simple decoration on the sheath.

The leuku is a multi purpose tool. There are several smiths making leukus and they are available from some of the manufacturers of Nordic knives such as Strømeng http://www.samekniv.no/index.php?option=com_content&task=blogcategory&id=52&Itemid=67. They are popular for use among those who like to hike and camp in the forests, “bushcrafting” as well as the reindeer herders.

Here is a very nice custom made leuku by puukkoseppä Mikko Inkeroinen. See more of Mikko’s fine work at his website   http://seppainkeroinen.net/  

From correspondence with Thomas (edgepal):

“I lived with the Sami people for 20 years in the high Mountains (alps) of Sweden. My wife was Sami and her parents and 6 brothers were living the traditional Sami life and life style. I lived in the mountains with her relatives for 6 months every year and two of my three sons work with reindeer today.

During my years in the mountains I carried a Sami type knife belt with two knives, one normal sized Sami knife and one “huggare” also called a chopper or Leuku. Leuku is a Finish name for a huggare and it is used only in Finland. They also are named “Lapphuggare”,  Sami chopper in Sweden and Norway.

The chopper is a working knife, made for hard work and I have used choppers a lot in my life – and I still do, but now I do not make shelters and so on – I walk home instead to a warm fire, a good whisky and a loving wife. That is much more comfortable in my age. Choppers, leuku or huggare is a very special type of knife, it is not just another knife. It is designed for arctic use by a nomadic people. Every part of the complete knife is designed for just this. I know that today’s knife makers make their own design of them, but in my mind, those knives are not a huggare, it is something else. Perhaps a sort of Bowie?

A leuku, as all old traditional knives, are designed from the need of them in first hand,  and then from the real using of them during a very long time. Every generation changed the leuku’s basic design so it functioned a little better,  until there was no reason to change it any more, the function was 100% effective. That was some hundreds of years ago.

There is many reasons behind the design we see today on a “standard” leuku. It is a 100% functional design for what it shall perform in just that climate. The balance, the blade length, the handle material, the knob – every small detail is important for its use.

A good huggare shall have a big knob on the handle. It is necessary in the arctic climate and this knob is used in many ways depending on what I am chopping, big branches or small branches  birch or pine branches – or if I split wood, or build a shelter. Sometimes I hold my chopper just with the little finger and let the rest of the handle slide inside my hand and all the rest of my fingers just steer the huggare so I hit exactly what I like to hit. For example tiny branches in a bush, and for that job the knob is very important, if there was no knob  the knife will slide out of your hand, especially when it is wet and cold and during the winter. And of course, when you have chopped like that for 2-3 hour your hand will be very tired.

No metal pieces on the handle in the arctic climate, that is very important when the temperature goes below minus 30 centigrade. I hate thin blades that “vibrates”on huggare. That is why I make my own huggare, 5 mm thick blade, 20-22 cm long blade, about 25mm wide blade, convex edge in about 26-30 degrees,  and it works like a dream, at least for me.

When living with knives as your only tools, you see what happens to the edges during time. Years ago I started to think about a sort of sharpening tool that will give a locked angle – and when I became older I had the time to construct tools from those thoughts. Today that is EdgePal sharpening tools and you can find them on my homepage:  http://www.edgepal.com/ where there is also a page in English.

If you search at http://www.britishblades.com/forums/forumdisplay.php?41-Scandinavian-Blades…  you will find a lot of things written about huggare/leuku. I have written some things, search for topics by ‘edgepal’.”

Thomas

Thomas’s leuku, huggare, or chopper.

Igor Barutkin – Knives of the Lappish Pures

Igor Barutkin lives the Lappish village of Lovozero near Murmansk in northernmost in Russia:  “Very interesting and beautiful places. Lakes, Hibinsky mountains, tundra… Look on Google:) Earlier I often went to the North of Finland and Norway and was in Ekmokk. Now there is no time while. Lappish knives and utensils, it is my bread, my work. My way of life.”

Igor is a student of Jon Ole Anderson and practitioner of duodji, the Sámi traditional way of life.  The word duodji is also used as a mark of authentic Sámi handicraft. It relates first of all to the handicraft itself and in second place to the Sámi way of life. Igor can be found on Facebook at https://www.facebook.com/profile.php?id=100002077936834 Take a look at his work!

From http://www.sameslojdstiftelsen.com:

“The knife is a universal tool. The Sámi often have several knives hanging from their belts. The knives have different functions. The larger knife is used instead of a hatchet, the everyday knife for all kinds of daily needs, the calf-marking knife is special and is used to cut the markings on the reindeer calves’ ears.

The form of the sheath of the knife depends on the natural shape of the reindeer antler and one can basically distinguish two typical shapes: one with a long gentle curve and one with a more pronounced curve. The sheath with the more pronounced curve occurs more commonly in the north. The handle of the knife is made of masur birch and reindeer antler, or totally of reindeer antler. The handle often has bark between the antler pieces that gives a good hold and keeps the handle from slipping in a person’s hand. The handle ends at the top in a knob. The knob is bigger in the north Sámi area while it isn’t as pronounced in the central and south Sámi areas. In the north Sámi areas the handle is often times not engraved while engravings in the handle are common in the central and south Sámi areas.

Knives are made principally in three different variations: 1) the sheath and the handle are made totally of reindeer antler; 2) the sheath is made of reindeer antler, the leather casing of rawhide and the handle of wood or reindeer antler or a combination of both antler and wood; 3) the sheath of wood and the handle of wood or reindeer antler or a combination of both antler and wood. There are also other varieties of knives with the sheath of leather and knives that only have a wooden blade protection, bark or reindeer antler. The knife with a sheath and handle totally made of reindeer antler is considered the artistic handicraft variety of Sámi knives, while the other varieties are considered everyday knives. All the sheaths have a braided reindeer cord to to hang from the belt.

The north Sámi engraving is characterized by the geometric star, flower or heart motives in combination with curved lines, edging and shadings. The edging consists of different engravings, sometimes a combination of different geometric cuts made with the sharp point of the knife and sometimes combined with curved lines. Especially typical is an edging that is like twined cord.

Characteristic for the south Sámi areas are braided patterns. The braided pattern is created by both lines and a combination of the patterns made with the point of a sharp knife. The design often covers the whole handle or sheath. The edging is very strict and is completed by cross-like knife cuts in both simple and double rows. Within the central Sámi area the same braided patterns occur as in the south, the shaded curves, but even simpler star and cross-like design patterns which communicate a relationship with the designs in the north Sámi areas. The lines of the star design are often finished with cuts with a sharp knife. In the production of knives, the traditional designs and pattern combinations have changed more recently to a more general Sámi design and pattern.”

Igor makes some of the most beautiful knives you will ever see, here are a few of my favorites:

ImageImageImageImageImageImage