Tag Archives: Juha Nikki

Juha Nikki: Recent Work

Juha Nikki – Recent Work

Mike has generously prompted and prodded me for an update on what I’ve been working on recently, so here goes. The knives below have been made in the last couple of years. As you can probably work out, I only make a handful of knives a year.

The latest development for me is that I’ve moved down from Northern Finland –  Lapland – to the South. Whilst here, I’ve been taught to forge my own blades – something that was a surprisingly easy skill to pick up under good tutorship. Which is not to say I’m suddenly an expert smith or even a smith at all, far from it. I don’t think that I’ll make a habit of forging my own blades. I’ll leave that to the smiths who enjoy it – forging was fun, but I like the other aspects of knife making more. There are plenty of good smiths in Finland I can buy blades from. A lot of them will sell blades despite the fact that we have this weird perception here, where everyone who can forge should apparently make the whole puukko themselves and those who can’t (won’t) should stick to knitting. I don’t quite see the reasoning behind it, but people are entitled to their opinions. I might just knit my next puukko handle…

The little knife above is one which I made years ago for my personal workshop knife – it took about 30 minutes to put a handle to and finish. The blade it by a smith in Wales, called Nic Westermann, and it is a little miracle. If memory recalls, it’s about 2 mm thick and 50 mm long. It’s a laminated blade, with a hard core and flexible cheeks. It was as sharp as a razor, very easy to sharpen and kept it’s edge well. It was so good, I regret that it left my workshop… A reindeer herder in Lapland saw it and decided it would be ideal for ear marking reindeer, to I spruced the knife up a bit and made a sheath and regrettably sold it.

The puukko above is in a kind of Sami style and has a blade by Jukka Hankala – I was very lucky to get it through a contact in France, no less… The timber is birch burl from my (ex) local Lappish forest and there is reindeer antler in the knife and sheath, too. The joints in the handle are spaced with vulcanized fiber. I like to file grooves in the joints between different natural materials, as they are bound to expand and contract in different ways as time goes by. The groove will hopefully prevent any obvious notches or steps appearing at those joints. It’s a small job to do and easy to skip, but i like to think details matter. A matter of personal taste, of course – in other places I like rustic finishes.

This knife has a Damasteel blade by Ralph Etzold. The puukko was shipped to Hawaii, which is why the sheath has in its decorations the leaf of both the Hawaiian and Finnish national trees. The handle is stabilized timber and the sheath is of stitchless variety, as most of mine are these days.

 This one was an excercise in design, as the brief from the customer was to make something unusual. The blade is a special commission from Joonas Kallioniemi (again, I was lucky to get such a good and rare blade). The handle is reindeer antler and double dyed Arctic birch burl.

 A skinner knife with a Polar stainless steel blade. Tried a bit of more accurate dyeing on the sheath and made an insert of reindeer antler, which is visible through the holes in the sheath.

A puukko with YP Taonta (Puronvarsi / Antti Mäkinen) blade. A stabilized alder handle, with stabilized materials I usually don’t file grooves to the joints as the material is, well… stable!

YP Taonta blade, ash burl and reindeer antler handle – this time with a groove on the vulcanized fibre spacer. Another stitchless sheath.

A stainless blade by Ralph Etzold, reindeer bolster. The timber is highly figured Arctic birch double dyed. Stitchless sheath.

This blue puukko is a very special one for a good friend. There are several connections to Lapland. It has a Damasteel blade made in Lapland by Ralph Etzold. The handle has a real gold nugget panned from a Lappish river, and the sheath has an Amethyst dug with my own hands from a mine in Lapland.

 Above a couple of photos from my first forging session on a knife making course.

And finally, above is the first complete knife with a blade forged by myself. The metal parts still need polishing, but it’s more or less there.

Note: Please see the Index page for other articles by Juha Nikki, including how to make a stitchless sheath.

Stitchless Scandi Sheath by Juha Nikki

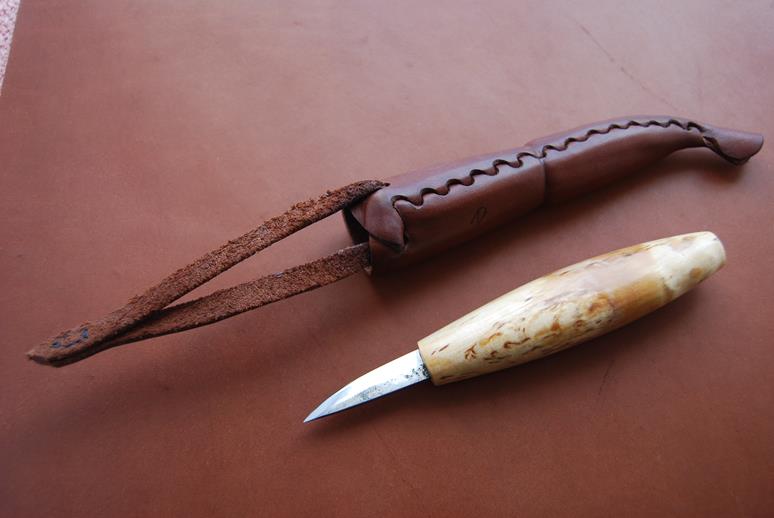
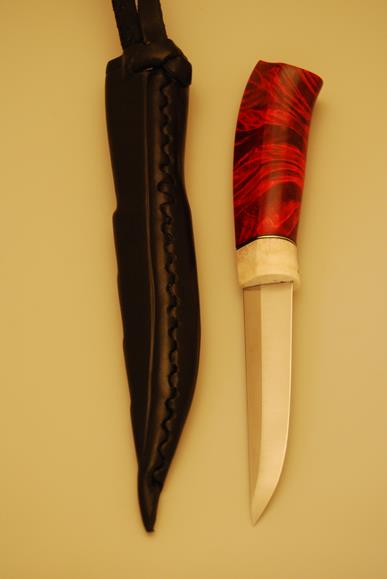
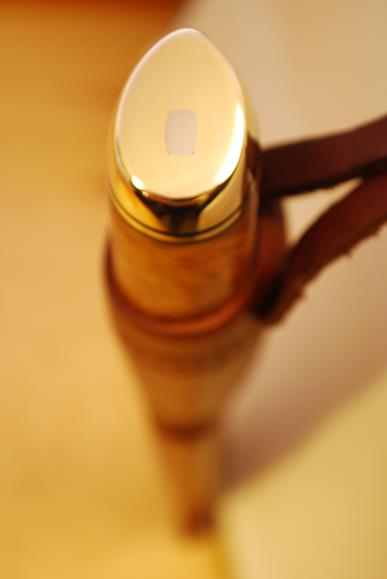
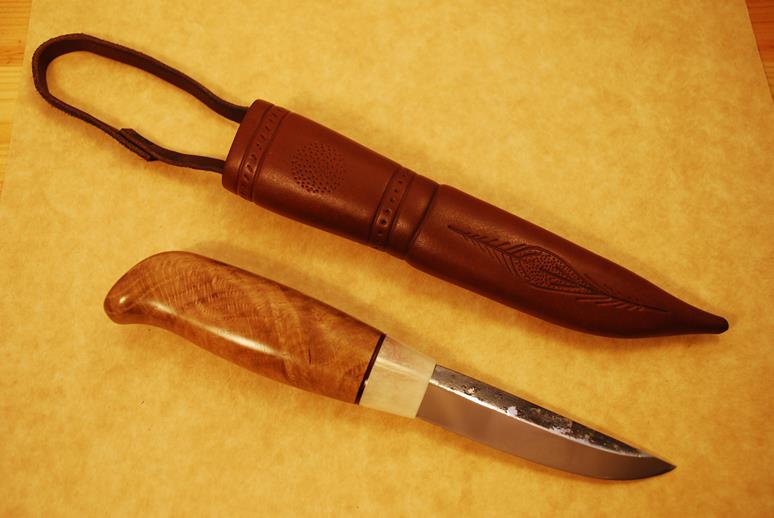
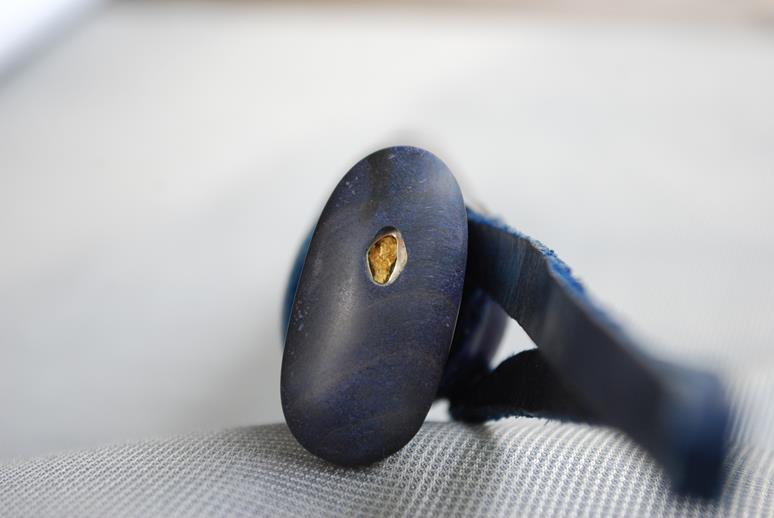
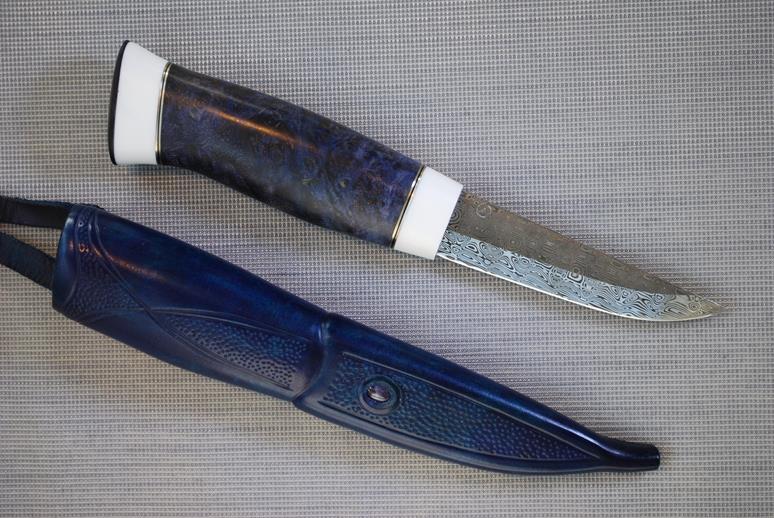
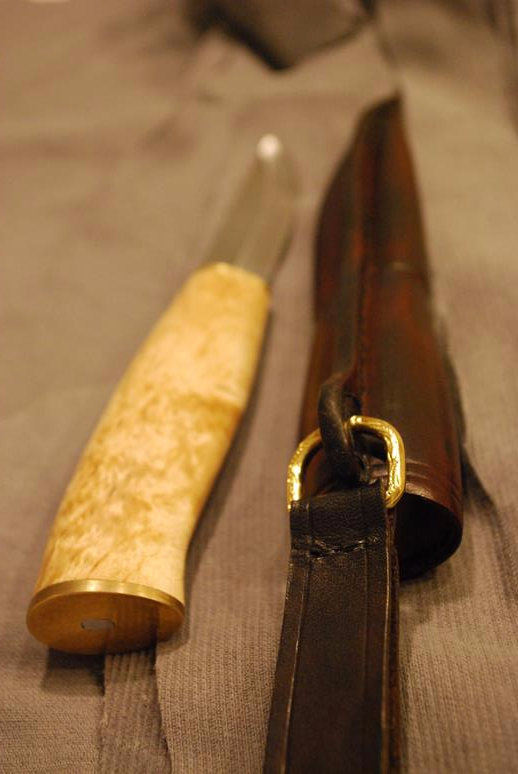
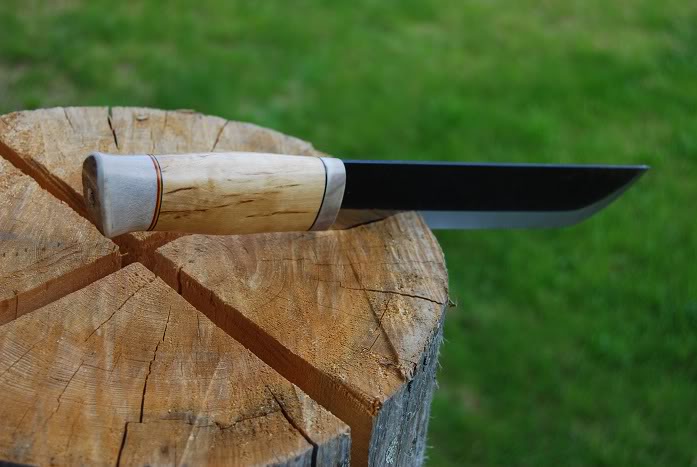
Here is the stitchless tuppi tutorial by Juha Nikki that was promised in last week’s post. This is something that I’ve wanted to feature here for quite some time and I thank Juha for the hard work and effort it took to create this post.  The knife he is showing here was made for a reindeer herder to use for marking the ears of his reindeer.

I hope you enjoy watching him create this sheath as much as I did, it’s an ingenious piece of work!

Stitchless sheath

I’ve finally got around to making a proper tutorial for constructing a “stitchless scandi sheath”, after lots of folks requested instructions for it. First of all, a note. This kind of a seam is not my idea. I saw a photo of a sheath with a similar type seam a couple of years ago. It was only the one photo, and I was intrigued by it, not really sure how it had been achieved. To this day, I still don’t know how that one was constructed, but I have come up with my own method of producing something similar looking. So far there are roughly a dozen of these out and about, originating from my shed.

The project below took me about 5-6 hours, excluding the leather drying time. It’s probably not the best type of sheath to be making as your first sheath, as some working knowledge of vegetable tanned leather is required. That said, I did teach someone to make one of these as their second ever sheath, and it worked fine.

Materials:
– 1 knife
– 1 insert for around the blade, wooden or plastic
– 1 piece of vegetable tanned leather, 2-3 mm thick
– 1000 ounces of patience

Tools:
– narrow tipped pliers
– leather modeling tool (or a teaspoon with a thin top end!)
– hole pliers or hole punch, ideally with 4.5 mm hole included. A      punch will do, too.
– ruler
– pencil + eraser
– sharp implement for leather marking (e.g. modelling tool)
– knife/scalpel to cut leather with
– clingfilm
– sellotape, thin
– scissors
– paper
– sandpaper (optional)

To start off with, lightly oil the knife blade to stop it from rusting inside the humidity it’ll end up in. Then protect the cutting edge with a little strip of sellotape. Wrap the knife in about 3 layers of clingfilm. Reinforce with sellotape where necessary – the knife will have to be in and out of the sheath many times, so clingfilm alone might fail. Don’t make the wrapping too thick, though. The crucial bit is that no water can penetrate under the wrapping.

1j

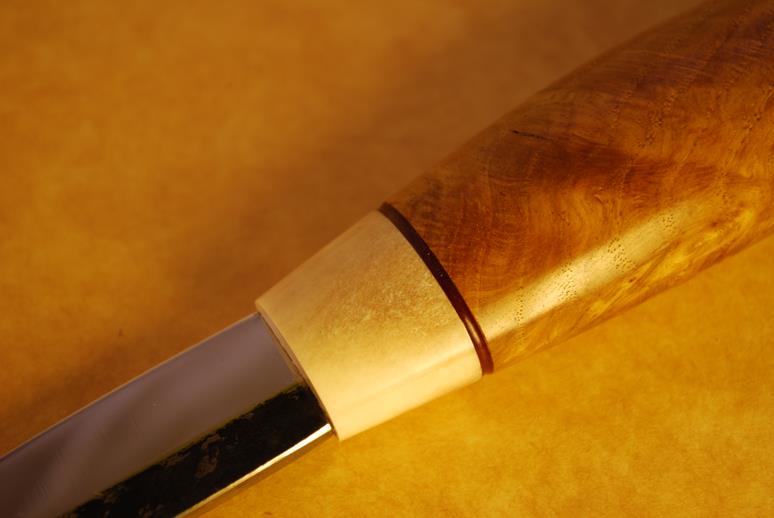
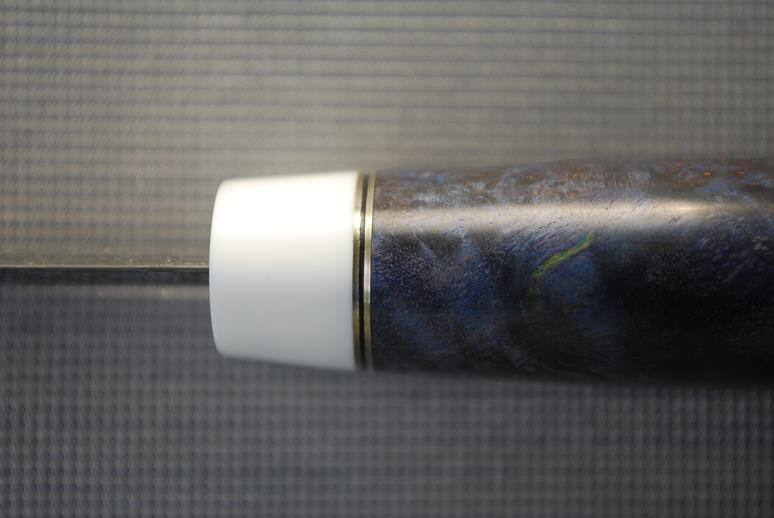
This is the knife with the wooden insert. Check there is enough space for the blade to go in even when it’s been wrapped.

3j

Make a crude paper model of the sheath by wrapping it around the knife-and-insert combination, as if it were a piece of leather. Make a mock seam where you see the actual seam ending up. Then mark the line of the seam where the edges of leather would meet. It doesn’t have to be millimeter perfect, but it’s important the alignment of the paper is the same as the leather will be, otherwise the seam can pull to all sorts of directions. Also mark up the mouth of the seam, i.e. the way the top of the sheath will be cut and the tip of the knife/insert.

5j

Cut out the paper model. There is no allowance for the seam, at this point. Try it around the knife and insert, making sure it’s right.

6j

I find it useful to mark up the line where the handle meets the insert, too.

6bj

Transfer the outline of the cutout to a fresh piece of paper. Then measure the circumference of the knife and insert in a few places with a narrow strip of leather, which is roughly the same thickness as the leather you’ll use for the sheath.

6cj

Transfer the circumference onto the paper – you’ll find the circumference being a tad more measured with leather than with paper. That’s why we’re doing this bit. (ignore the extra scribbles on the paper below)

6dj

You’ll end up with something like this:

7j

The next bit is to add about 6 mm of seam allowance to the top (handle part) of the sheath outline, and 8 mm to the bottom (blade part) of the sheath outline. The 6 mm (8 mm) extra goes to both sides. I just measure a few markers to the leather-measured outline and draw the rest free hand.

8j

Then spare a thought for the tip of the sheath. You can make your own mind up about what shape you want it to be. Two things to take into account: (1) Make the tip long enough, it can go quite a bit past the insert. You don’t want the insert showing. (2) The width of the point where the seam ends needs to be such that it the two last holes made for the seam are at least 20 mm apart. Otherwise there won’t be enough space for the leather to bend around and you can’t join the seam. This is why I’ve drawn and measured the two holes pictured below.

9j

Now for the top of the sheath. I’m going for an integrated belt loop for this one, so I’ll include the belt loop into the drawing. Usually I go for 11-12 cm in length of the strips for the loop and around 7 mm is a good width. There are all manner of things you can do to join the strips at the top – stitch free is always good, so you can say your sheath has been made with just the leather, no string or glue etc. This time I think I’ll stitch the loop together, though.

The drawing is starting to look complicated, but it’s not as scary as you may think… Also, there are shortcuts and with experience you could probably miss out some stages I’ve described above.

12j

Next, tag the paper on top of your leather with a couple of bits of masking tape. Use the sharp end of a modeling tool to press dots on the outline, through the paper onto the leather. Make sure you have the paper and the leather the right way around. I’ve twice cut out a left-handed sheath by mistake… Also, make sure you mark the actual outline, not the paper-measured or leather-measured lines. You could even rub those out, to make sure.

14j

This is what you’ll have on the leather:

15j

Join the dots with a pencil.

19j

Job done, ready to be cut:

20j

Use hole pliers to do the tight inside curves, if you like:

21j

Group photo, leather cut out:

22j

You can thin the leather at the mouth of the sheath, but don’t thin near the start of the belt loop, as it’ll weaken the loops.

23j

Use an eraser to remove any remaining pencil lines.

24j

This bit is probably not needed, but I just did it this time. I sanded the sharp edges and ripples from leather’s edges resulting from my not so brilliant leather cutting efforts.

25j

Thin the leather towards the tip of the sheath. I thinned it from the line marked by the skiver downwards. I didn’t use the skiver, but a belt sander, which can be a surprisingly good tool for this job. 2-3 minutes on it and it was done, all evenly and no signs of the leather overheating. You have lots of control over the thickness at your fingertips. I used 80 grit. Do this at your own risk. Leather, belts and grinders are different, and you will have to be very careful with them. If you have a tried and tested method for thinning leather, use it.

26j

Holes for the seam are next. Start at the top of the sheath, on the shorter seam (the leather is asymmetrical for a sheath with the seam at the side of the blade). That’s the side that will be on the spine side of the blade. All the holes on this side will be 4.5 mm in diameter. The distance of the hole from the edge of the leather is about 2.5 mm. The first hole should be about 8-10 mm from the top edge (mouth) of the sheath.

27j

Start off by making a few holes (up to about 2/3 of the seam) at 5 mm from each other. I do this without measuring these days, but used to measure every hole diligently.

28j

Then mark where the last hole will be at the tip. It’s worth measuring the tip geometry altogether now, remembering the restriction that the bottom holes at the opposite sides should be around 20 mm from each other.

29j

Then work out how to make the holes in between. Definitely worth marking them up, this time. You can use slightly different gaps and hole sizes to adjust the spacing, but probably no less than 3.5 mm for either.

30j

One side done.

31j

Might as well make the holes marked at the tip of the blade side seam.

32j

Make a slightly smaller 3 mm hole for the top one on the second side, but the same spacing from the edges.

33j

Then it’s back to 4.5 mm holes at 5 mm spacing for a few holes.

34j

Now comes a mathematical bit – work out the spacing and sizes for the remaining holes in between. This side will have sort of T-shaped toggles, as the holes will be sliced open to the edges. The trick is to make the number of toggles match the number of holes on the other side of the leather. Each T-toggle will go through one hole. Obvious, really. But tricky for at least me to work out – and you don’t want to count it wrong…

35j

Don’t forget to empty your hole pliers now & then. 🙂

36j

All the holes for the seam done. As you can see, some different size holes were used on the second side, but try to keep the variation to the minimum.

37j

Now two more holes, indicated by pencils. These are for the belt loop. The beauty of this type of loop is that it keeps the mouth of the sheath closed tight. The toggles on their own might not be enough in the long term.

39j

Now cut the slits from each hole on the second side, forming the toggles. Pay attention at either end, to make a T-shape that will hold in a hole.

40j

Invariably, at this stage I’ll find that the tip of my sheath is the wrong size… Here’s an attempt to save this one. The holes change the tip quite a bit, which I never remember in time.

41j

Time to wet the leather. I had this one immersed for about 2 minutes only. It’s quite a critical bit of the seam making to have the leather at the right wetness. Too wet, and it’ll be so sloppy that the toggles won’t hold in the holes. Too dry, and they won’t go in.

42j

Ready to start ‘sewing’. Best start from the tip.

43j

Make the first hole a bit bigger with the pliers. This will help get the toggle in, and the hole will shrink back when the leather dries. Careful not to tear the edge – been there, done that.

44j

Fold the first toggle in two like so, with your fingers.

45j

Then use pliers and plenty of force to compress it together.

46j

Now for the part that is the trickiest of the whole process. It can make a grown man cry. Getting the first toggle into the first hole. Thin, sharp nosed pliers help enormously. By hook or crook (or pliers), stuff the damned thing in. Note that the toggle goes into the hole from the good side of the leather, not from the flesh side.

50j

Using the pliers initially, then the modeling tool, eventually you’ll tame the toggle. Hopefully. Once you have, straighten the toggle the best you can on the inside of the sheath, so it’ll stay in.

53j

It’ll be tricky, and sometimes you just have to trust for it to hold, once you’ve done all you can.

54j

The second one in the same way, this time lots easier. Phew. Straighten the toggle on the inside again, using fingers and/or pliers.

55j

Then just carry on the same way for a while.

56j

Once you are far enough to accommodate the blade insert, stick your finger into the sheath and stretch the sheath bigger from the inside. There will be quite a bit of scope for this. The more you can do this, the easier it will be to get the insert into where it needs to be, without destroying the seam. Also flatten the seam as best you can, so it won’t be in the way.

58j

Now stick in the knife with the insert. You didn’t put cling film on the insert, I hope? 😉

59j

Take the knife out, leaving the insert in the sheath. Finish up joining the toggles and holes. Hooray!

61j

The belt loop needs our attention.

62j

Stretch the holes a tad.

63j

Some extra wetting of the belt loop and the holes for it will be needed. This time they can be soaking wet, but try not to wet the seam.

64j

Sharpen the ends of the belt loop, and pull through the first hole, from inside out.

65j

Like so…

66j

The other one through from the outside in.

67j

Nearly done!

68j

The loop will have been squashed to within an inch of its life, so smooth it with a modeling tool or a bone. It’ll dry quickly.

69j

Stick the knife in, adjust the tightness of the belt loops, decide how much you want to pull them in. Then lightly press into shape the belt loop area of the sheath, as well as the area around the top of the insert. This way the insert should stay in – especially if you made it a bit thicker than the bottom of the handle. I tend to press a groove at the top of the insert, to make sure.

71j

Looks rough and ready, but it’s still wet… Now let it dry, checking occasionally that the knife will come out OK. Press the leather down if you spot any loose bits.

72j

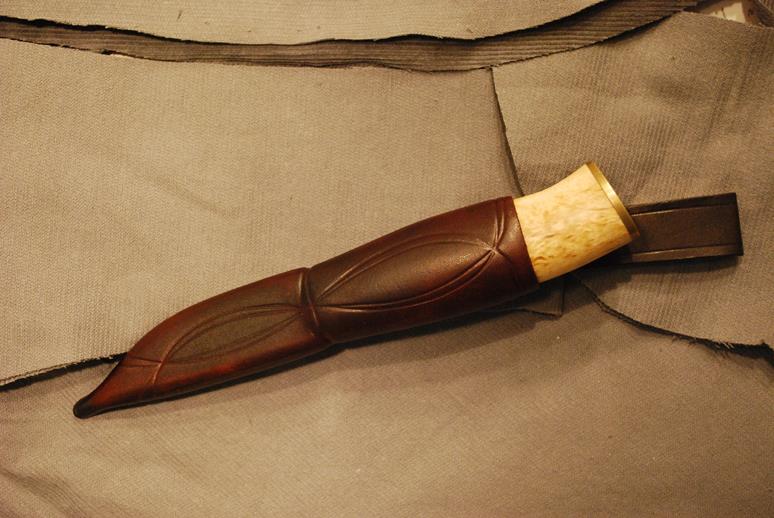
After 16 hours of drying and a bit of smoothing meanwhile:

73j

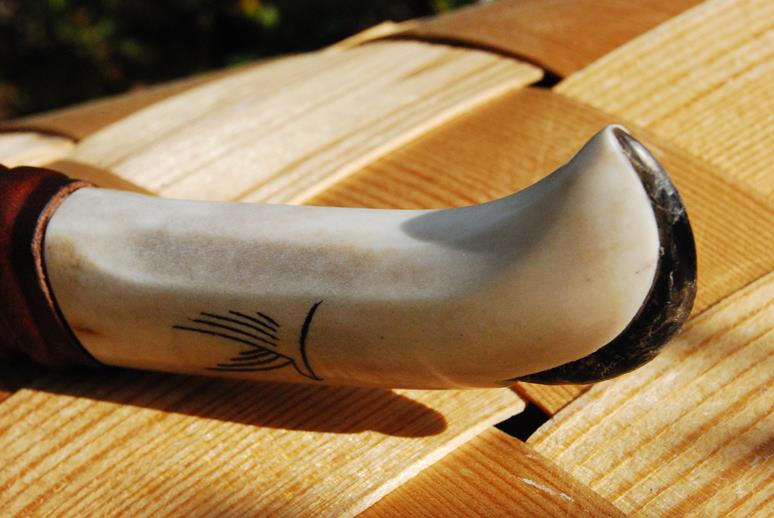
Decorations were made after 2-3 hours of drying, as well as the final shaping.

74j

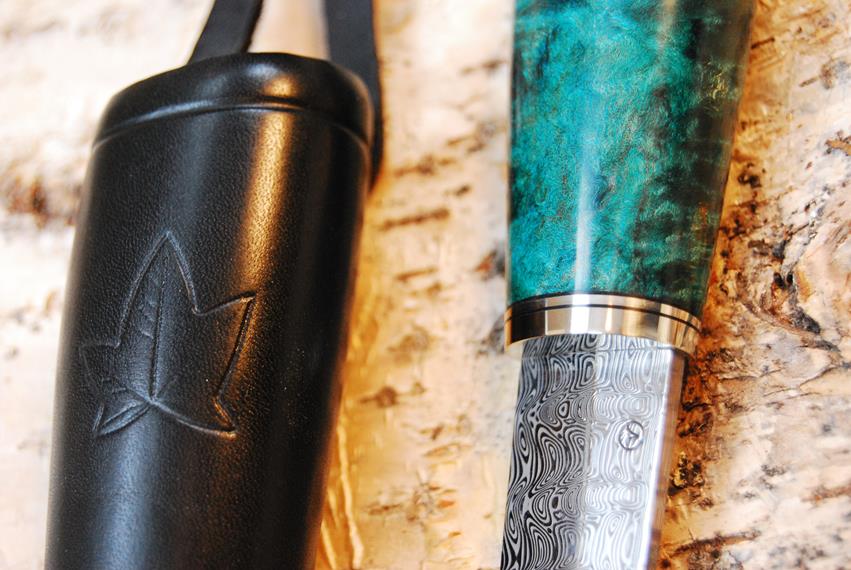
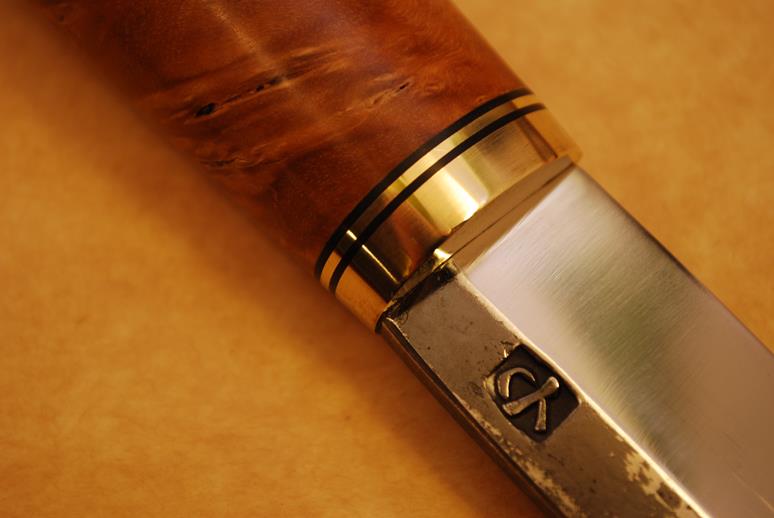
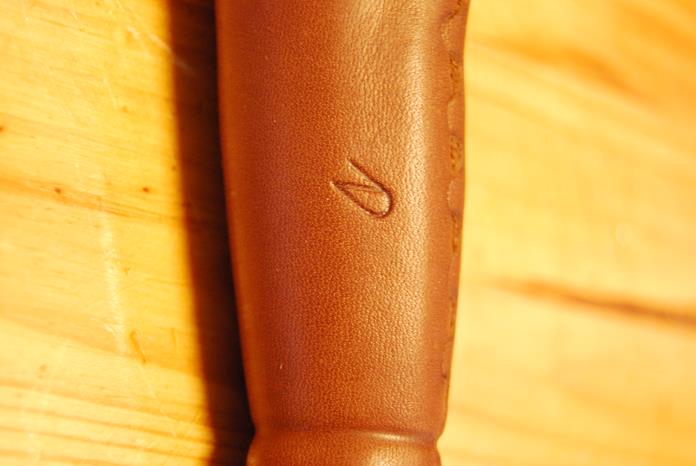
Maker’s mark included:

75j

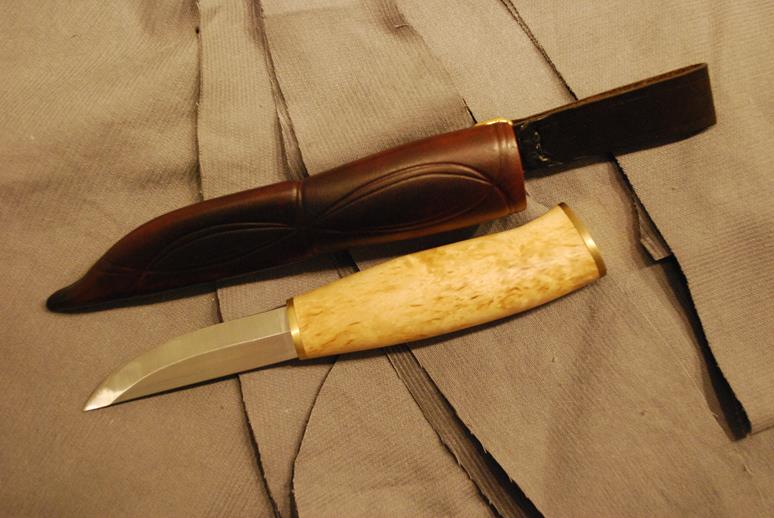
If you got the handle shape and the sheath right, there will be a reassuring click on inserting the knife. I’m pleased to say it’s happened for me every time – probably just luck. 😉

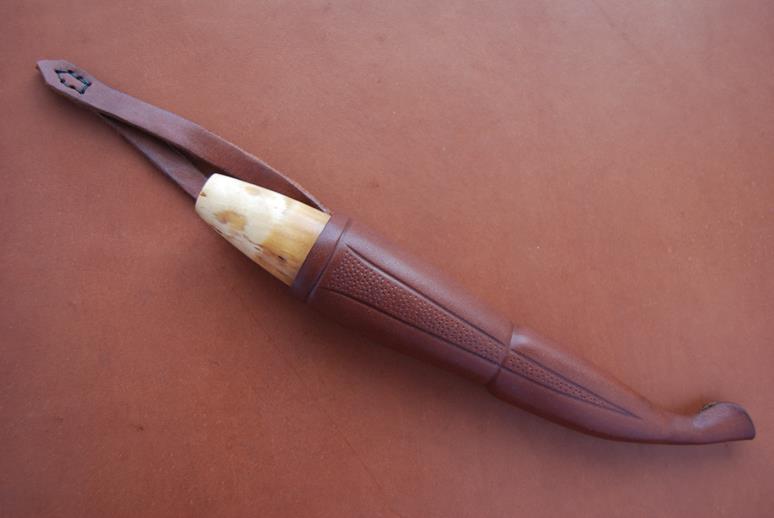
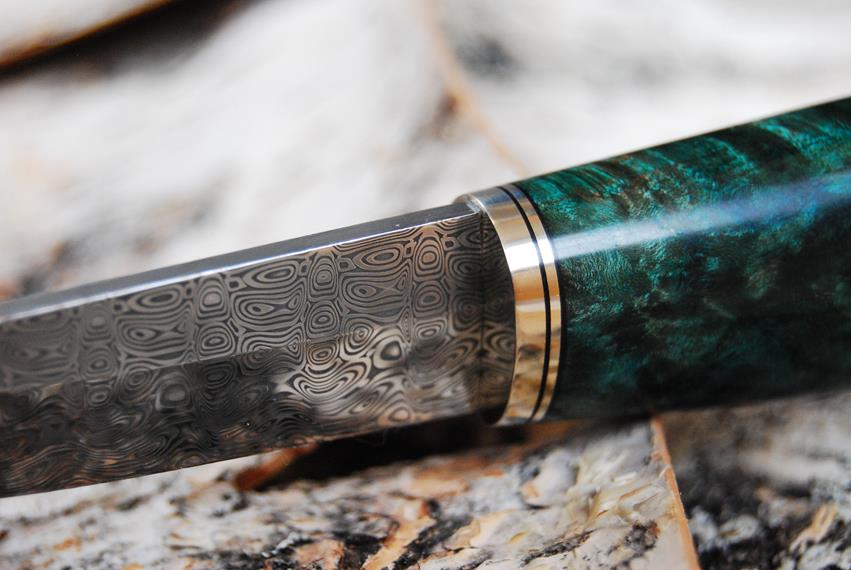
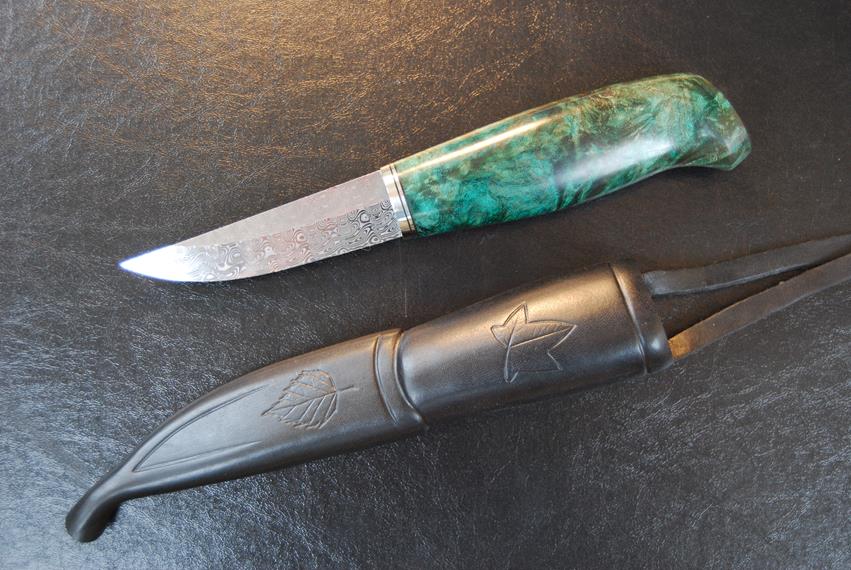
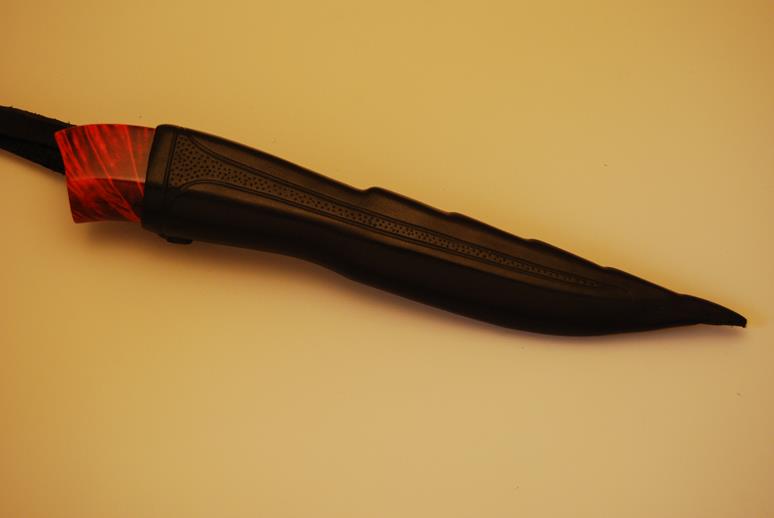
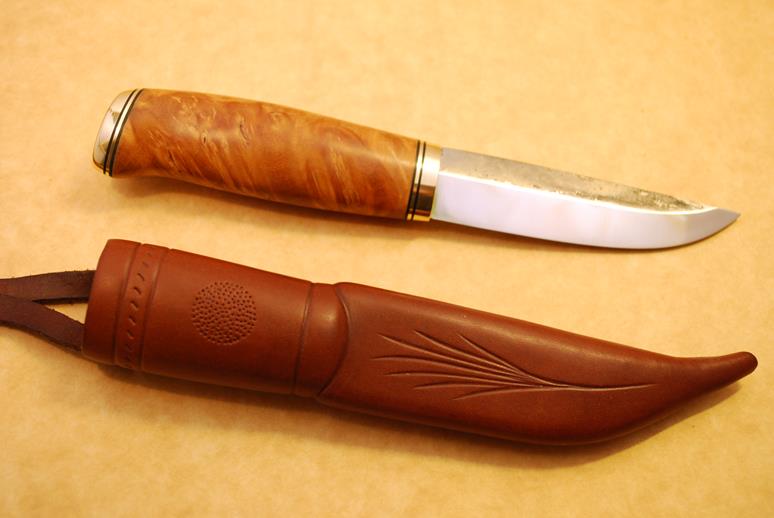
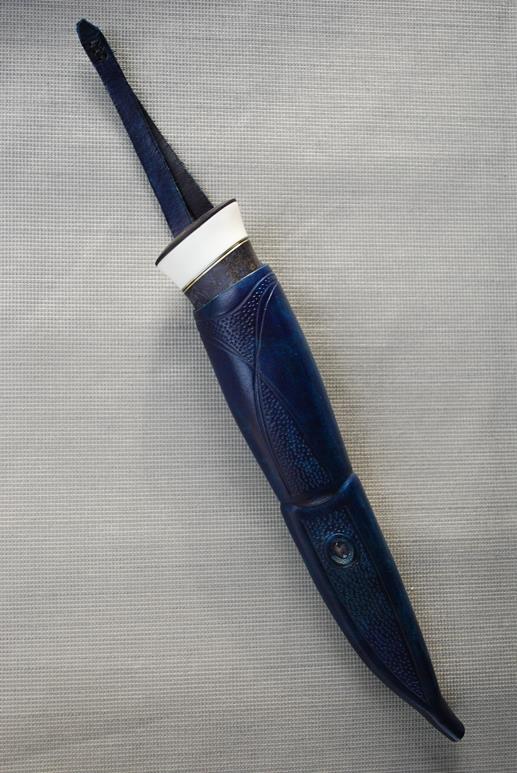
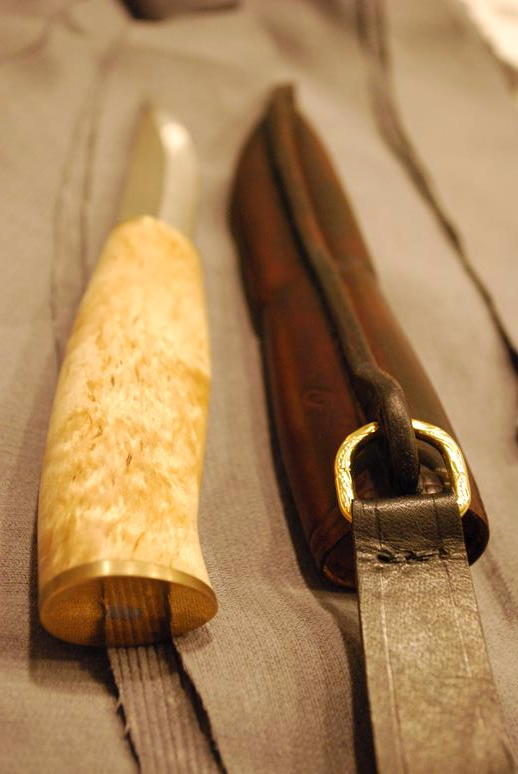
The finished article after greasing and polishing:

76j

77j

78j

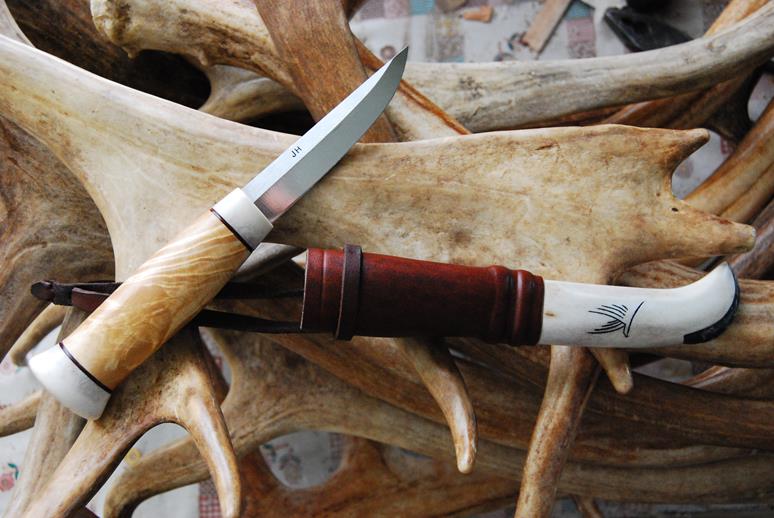
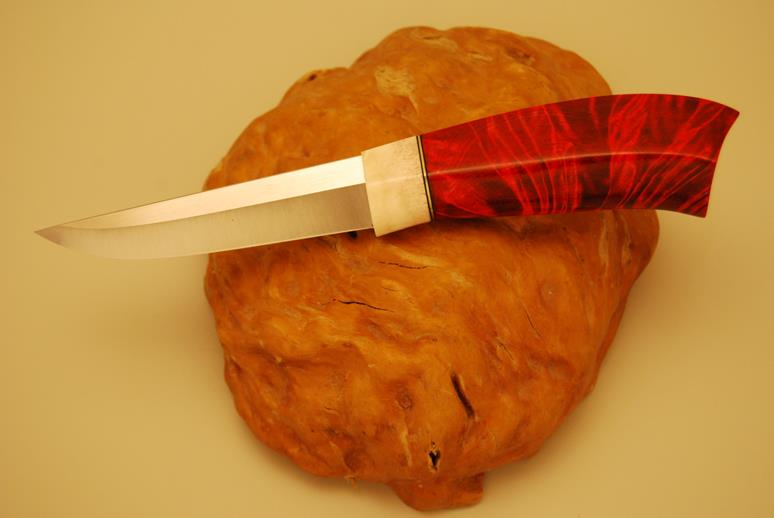
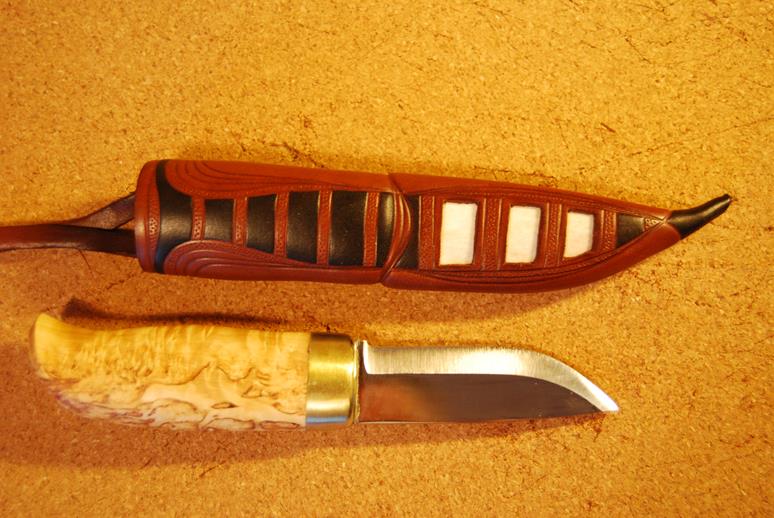
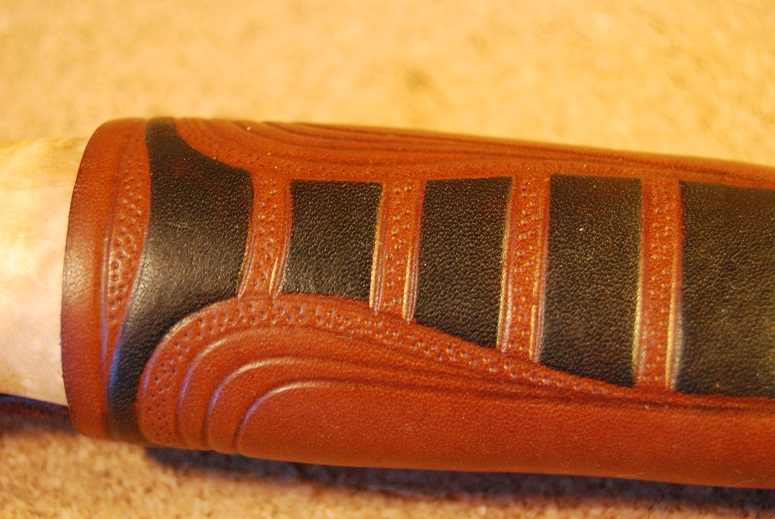
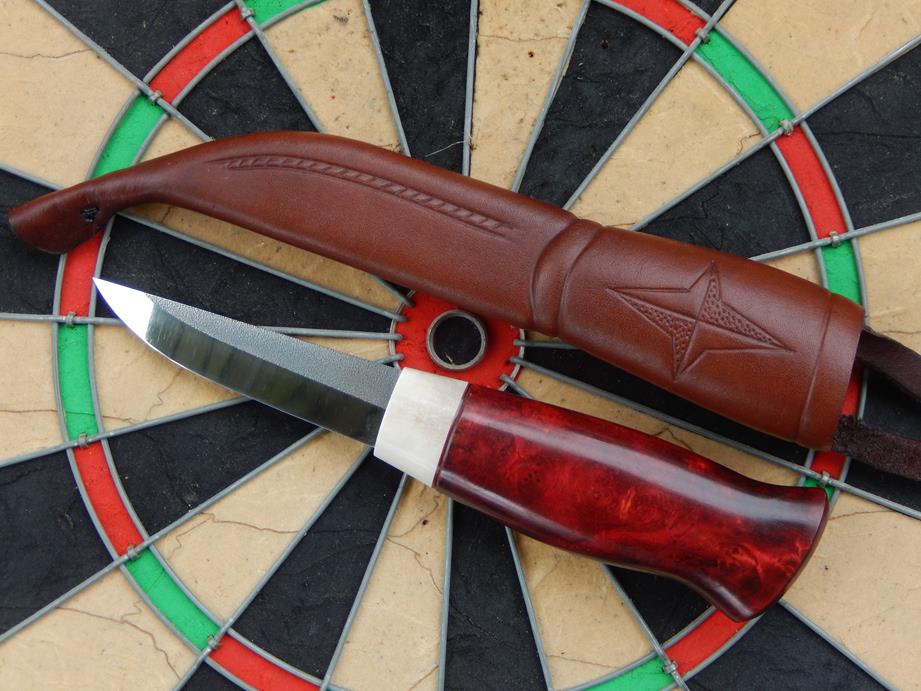
Some other sheaths from along the way:

81j

82j

83j

84j

85j

86j

87j

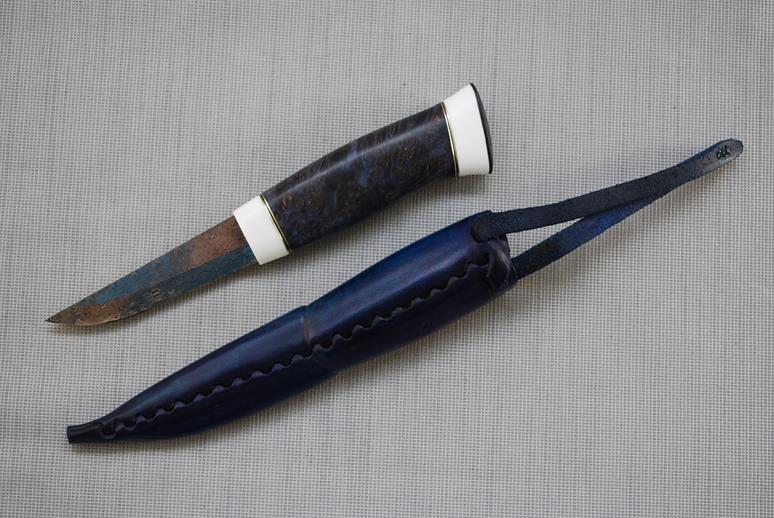
And finally, my very first attempt:

80j


Juha Nikki

In this post I’d like to introduce you to Juha Nikki, a very interesting and talented guy I became acquainted with at BritishBlades.com where he goes by the name of “bwildered”. He posted some photos of a tuppi he made with no stitching or glue and I began a conversation with him about it. You’ll see an example of it in the photos below and Juha has promised to do a tutorial for this blog showing how to make one. He also makes some very nice knives which I’m glad to show you.

Juha has written some thoughts of his experience as a part time puukko maker and I’d like to share it with you here:

Juha Nikki

“I’m a hobbyist knife maker living in Finnish Lapland. Knives have always been a part of my life in the sense that even though I don’t use them a lot, there are always knives handy to use as tools for those little DIY jobs. I only became seriously interested in knives a few years ago when I attended a knife making course in the local ‘night school’. I’ve since made a few dozen knives, but my pace is generally quite slow as I struggle to find the time to do knife work.

I’m originally from the South of Finland, a little place whose only claim to knife history is that there is a unique old knife from there in the Finnish National Museum. The knife is also featured in Juha Ruusuvuori’s epic Puukkokirja book.

J1

I’ve since lived in England for 12 years. I then moved here to Lapland where my interest in knife making started. Lapland is an absolutely fascinating place to live with its distinct seasons and varied light. Where I am, we have 3 weeks of no sun in the winter and 3 months of continuous sunlight in the summer. Here is a small sample of what it can look like around here:

1scenery 2scenery 3scenery 4scenery 5 scenery 6scenery

As far as I know, there is no other particular knife making tradition in the immediate region of Lapland that I live in, or a unique knife style. However, almost everyone is some kind of an expert knife user, even if it’s just with gutting fish. The reindeer herdsmen, of course, have a very versatile skill set. While sporting knives in public places here is a crime in theory, people wear knives on their belts so commonly, that it’s not unusual to see them with a knife hanging from their belt in shops and other public places. Also, lots of people have made and still make their own puukko as a special thing, but almost always with a purchased blade. There hasn’t been a blacksmith in our little town for a long while, although I have heard the last remaining smithy was only fairly recently dismantled.

I still have and use my first puukko. It is a Marttiini Ilves, which I got from my parents as a birthday present when I was about seven years old. The knife is living proof that I am not a great knife user, as the blade has still plenty of steel left after nearly 40 years. The life of this puukko hasn’t been easy. Before I knew much at all about knives, I reprofiled the handle as it was loose and needed peening again. I also sanded the cracked lacquer off the partly moldy handle and had heard somewhere oiling would be better for the timber. So, on went a coat of motor oil… The sheath has also had a bit of stitching very inexpertly renewed.

2a

I got the basics for my knife making from the knife making course, and the rest I have picked up myself, with enormous help from the Internet. At this point I must mention British Blades, which is a knife forum that has been not only a great source of information, but also inspiration, motivation, trading etc. I must’ve spent hundreds of hours in the past few years reading up about knives, especially puukkos online. Sad, I know. However I feel I’ve accumulated quite a good understanding of what I like and don’t like when it comes to puukko knives.

My taste in knives is such that the only things I understand anything about are puukko and leuku. I don’t claim to be an expert on either, but those are what I’m interested in, and those are what I make. With materials, I’m becoming more and more in favour of simplicity. For some time now, I’ve thought that one knife handle should only ever have one timber.

There are very, very few puukko type knives I’ve ever seen that ‘work’ in my eyes, if there is more than one timber used on it. My absolute favourite timber is birch burl. The chatoyance on a good piece is just wonderful, and everything I could ask from a good looking puukko handle. Of late, the combination of reindeer antler and birch burl has been what I’ve used a lot. Luckily, both of those materials I can get very locally, indeed.

I have used exotic and even stabilized timbers in the past and will do so in future, but coming back to birch burl is always a pleasure.

There’s no particular style within puukkos that I restrict myself to. I like to experiment with handle shapes. Sami style knives and simple, well executed barrel shape puukko knives are my favourites. I’ve decided against doing Sami style decorative antler carving myself. That’s down to several reasons, the main one being that it’s very difficult! When it comes to looking at knives made by other people, Sami knives are hands down my favourites. The more elaborate carvings, the better. Other than that style, I favour simplicity in knife handles – but not all the way down to minimalism with only one-piece handles and no decorations at all. I just think most of the time limiting the amount of decorations gives the existing embellishments more weight.

3a 4a 5a

With blades I quite like a rustic finish, although at the same time a nicely finished, sanded silver steel blade like those of Jukka Hankala and Joonas Kallioniemi are great. My preference is not to have a ricasso in a puukko, though it makes the life of a knife maker a lot harder. The same goes for rhombic cross-section puukko blades. Stainless steel blades are something I rarely use, mainly because it’s hard to find a decently shaped puukko blade without a ricasso in stainless steel.

Another reason is that especially in Finland there are a lot of people, who being heavy puukko users and very aware of both tradition and characteristics of various blades, have their suspicions about the properties stainless. What I’m not quite sure about is whether the suspicions are valid with the most modern variations of stainless, but they probably are in terms of the availability of puukko blades in said modern steels. Note to blade makers… There may be a gap in the market there!

The two main aspects in knife making for me are (1) producing as good a fit and finish as I reasonably can and (2) trying something new as often as I can.

The quality of the fit and finish will always have some room for improvement, otherwise no knife would ever be complete – and what is a ‘reasonable’ finish is for each to decide on their own. I don’t think I’ve ever made two puukkos that are even remotely similar. I like to experiment with different handle styles, but without going overboard. This usually means trying out well-proven classic shapes that have already been made in various regions of Finland and in some cases Sweden.

The new things I try can be for example a rounded joint between two handle parts, a hammered finish to a bolster, using different leather for a sheath, using a particular handle material for the first time. The list so far is dozens and dozens of things, and will get longer. One thing I like about knife making is that you don’t have to get stuck into a particular formula, even if you just stick to puukkos. I still have countless techniques and styles to try out.

1roundjoint 1a

My obsession with knife handles is trying to make them symmetrical. I always have at least two long breaks from the handle shaping, when I go watch the TV for the evening and occasionally stare at the half-finished handle from different angles, trying to decide which bits to fine tune to make it perfectly symmetrical. More often than not, I employ my long suffering wife to help me with this.

She has become quite the expert in what we call The Art of Knife Staring. Now, I’m not saying my handles end up more symmetrical than anyone elses, just that I’m more obsessive about it and probably worse at spotting the flaws. Hence, I have to put a lot of effort into it. I think my record from the early days is ten hours of shaping the handle before the final sanding. Crosscut spalted timber was not ideal for ogling the lines! These days I’m quicker, fortunately.

Leatherwork used to be something I dreaded, and didn’t like doing. Nowadays it’s one of the more interesting aspects of knife making, and I enjoy it. I’ve experimented with quite a few different sheath variations. My specialty in it is making a seam without the use of any thread or glue. This is done by interlocking the edges of the leather through a series of holes and toggles. I call these sheaths ‘stitchless scandi sheaths’, just to distinguish them from ‘normal’ sewn sheaths, which I still also make.

1stitchless

I did once make a stitchless sheath for a big leuku knife, too. That was probably the most complicated piece of leather work I’ve done so far, and required a lot of planning especially with the belt hanger loop.

1 leukusheath

My workspace consists of three different spaces. One, I use a belt sander outdoors, because I haven’t yet installed any dust removal system indoors. This restricts the knife making sometimes, as the temperatures in the winter can plummet to -40 degrees Centigrade. I have been using my belt sander at -35C, but the ON button needs warming up with a hairdryer, otherwise the rubber around it is so stiff you can’t switch it on…

1workspace

Workspace number two is a room next to the garage in an unheated outbuilding. It’s where I sand and shape the handles after they have been rough shaped on the belt sander. 90% of the time, when the knife comes out of the belt sander stage, it can be sanded directly without any need for filing. Saves a lot of time, although I used to enjoy shaping the handle with hand tools only, as well.

2workspace

Pretty much everything else, i.e. the ‘clean work’ and leatherwork I do in our house in a room converted into a hobby room for me and my wife’s silverwork and other crafts. As you can see, tidiness isn’t one of my virtues. I do make sure the spaces I work with leather are always spotless, so the leather doesn’t get dirty.

3workspace

Sometimes it’s scary how much materials I’ve accumulated. The photo below is missing some bits, like a half a dozen complete birch burls… Finding good bits of reindeer antler is sometimes a challenge, despite the pile in the corner.

1materials

As far as hobbies outside of knives are concerned, I try to exercise to keep at least remotely fit. Most active I am on cross-country skis, both classic and skating styles. I also hike (day trips only), cycle and snowshoe at very infrequent intervals. Chopping our own firewood and clearing the snow from the yard is also very good exercise.

As you can see above, I probably talk knives more than make them…”

Juha Nikki

Juha Nikki

This is one of my favorites by Juha. It has a rattle in the Sami tradition.

This is one of my favorites by Juha. It has a rattle in the Sami tradition.

2 leuku

Again, I try to experiment with something new with most stuff I make. This one must be fairly unique in the modern day – it’s got a rattle… The Sami people, who are the original users and creators of the leuku, apparently have thought that a little rattling sound from a knife when it is used will keep the evil at bay. No harm in trying, I reckoned. So in went a little antler ball its little cavity. The rattle is barely distinguishable, so you won’t be scared or annoyed by it yourself, I believe.

3 leuku

6a

7a

8a

4 leuku

8k

9k

10k
11k

12k
13k
14k

2 knive

And for something a little different here is a phone case Juha made using his stitchless closure technique.

1 phone case

2 phone case 3 phone case