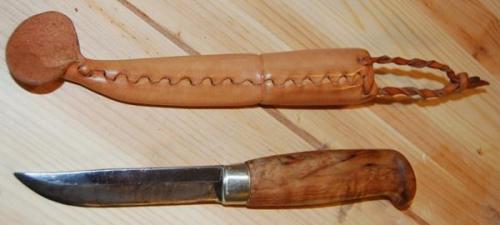
Here is the stitchless tuppi tutorial by Juha Nikki that was promised in last week’s post. This is something that I’ve wanted to feature here for quite some time and I thank Juha for the hard work and effort it took to create this post. The knife he is showing here was made for a reindeer herder to use for marking the ears of his reindeer.
I hope you enjoy watching him create this sheath as much as I did, it’s an ingenious piece of work!
Stitchless sheath
I’ve finally got around to making a proper tutorial for constructing a “stitchless scandi sheath”, after lots of folks requested instructions for it. First of all, a note. This kind of a seam is not my idea. I saw a photo of a sheath with a similar type seam a couple of years ago. It was only the one photo, and I was intrigued by it, not really sure how it had been achieved. To this day, I still don’t know how that one was constructed, but I have come up with my own method of producing something similar looking. So far there are roughly a dozen of these out and about, originating from my shed.
The project below took me about 5-6 hours, excluding the leather drying time. It’s probably not the best type of sheath to be making as your first sheath, as some working knowledge of vegetable tanned leather is required. That said, I did teach someone to make one of these as their second ever sheath, and it worked fine.
Materials:
– 1 knife
– 1 insert for around the blade, wooden or plastic
– 1 piece of vegetable tanned leather, 2-3 mm thick
– 1000 ounces of patience
Tools:
– narrow tipped pliers
– leather modeling tool (or a teaspoon with a thin top end!)
– hole pliers or hole punch, ideally with 4.5 mm hole included. A punch will do, too.
– ruler
– pencil + eraser
– sharp implement for leather marking (e.g. modelling tool)
– knife/scalpel to cut leather with
– clingfilm
– sellotape, thin
– scissors
– paper
– sandpaper (optional)
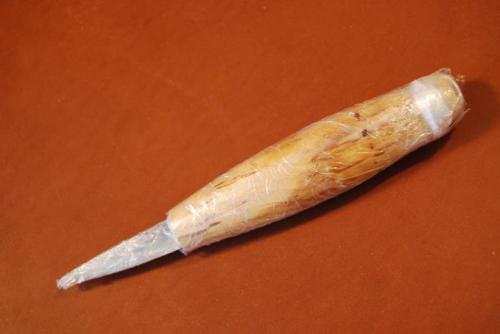
To start off with, lightly oil the knife blade to stop it from rusting inside the humidity it’ll end up in. Then protect the cutting edge with a little strip of sellotape. Wrap the knife in about 3 layers of clingfilm. Reinforce with sellotape where necessary – the knife will have to be in and out of the sheath many times, so clingfilm alone might fail. Don’t make the wrapping too thick, though. The crucial bit is that no water can penetrate under the wrapping.
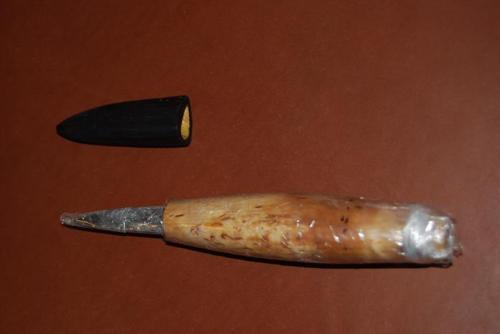
This is the knife with the wooden insert. Check there is enough space for the blade to go in even when it’s been wrapped.
Make a crude paper model of the sheath by wrapping it around the knife-and-insert combination, as if it were a piece of leather. Make a mock seam where you see the actual seam ending up. Then mark the line of the seam where the edges of leather would meet. It doesn’t have to be millimeter perfect, but it’s important the alignment of the paper is the same as the leather will be, otherwise the seam can pull to all sorts of directions. Also mark up the mouth of the seam, i.e. the way the top of the sheath will be cut and the tip of the knife/insert.
Cut out the paper model. There is no allowance for the seam, at this point. Try it around the knife and insert, making sure it’s right.
I find it useful to mark up the line where the handle meets the insert, too.
Transfer the outline of the cutout to a fresh piece of paper. Then measure the circumference of the knife and insert in a few places with a narrow strip of leather, which is roughly the same thickness as the leather you’ll use for the sheath.
Transfer the circumference onto the paper – you’ll find the circumference being a tad more measured with leather than with paper. That’s why we’re doing this bit. (ignore the extra scribbles on the paper below)
You’ll end up with something like this:
The next bit is to add about 6 mm of seam allowance to the top (handle part) of the sheath outline, and 8 mm to the bottom (blade part) of the sheath outline. The 6 mm (8 mm) extra goes to both sides. I just measure a few markers to the leather-measured outline and draw the rest free hand.
Then spare a thought for the tip of the sheath. You can make your own mind up about what shape you want it to be. Two things to take into account: (1) Make the tip long enough, it can go quite a bit past the insert. You don’t want the insert showing. (2) The width of the point where the seam ends needs to be such that it the two last holes made for the seam are at least 20 mm apart. Otherwise there won’t be enough space for the leather to bend around and you can’t join the seam. This is why I’ve drawn and measured the two holes pictured below.
Now for the top of the sheath. I’m going for an integrated belt loop for this one, so I’ll include the belt loop into the drawing. Usually I go for 11-12 cm in length of the strips for the loop and around 7 mm is a good width. There are all manner of things you can do to join the strips at the top – stitch free is always good, so you can say your sheath has been made with just the leather, no string or glue etc. This time I think I’ll stitch the loop together, though.
The drawing is starting to look complicated, but it’s not as scary as you may think… Also, there are shortcuts and with experience you could probably miss out some stages I’ve described above.
Next, tag the paper on top of your leather with a couple of bits of masking tape. Use the sharp end of a modeling tool to press dots on the outline, through the paper onto the leather. Make sure you have the paper and the leather the right way around. I’ve twice cut out a left-handed sheath by mistake… Also, make sure you mark the actual outline, not the paper-measured or leather-measured lines. You could even rub those out, to make sure.
This is what you’ll have on the leather:
Join the dots with a pencil.
Job done, ready to be cut:
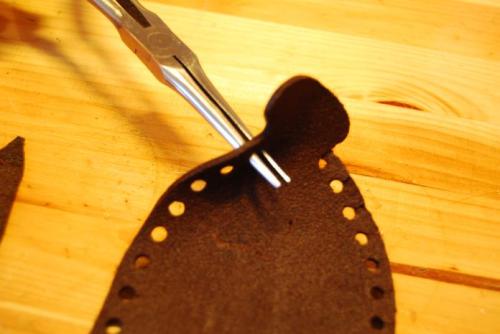
Use hole pliers to do the tight inside curves, if you like:
Group photo, leather cut out:
You can thin the leather at the mouth of the sheath, but don’t thin near the start of the belt loop, as it’ll weaken the loops.
Use an eraser to remove any remaining pencil lines.
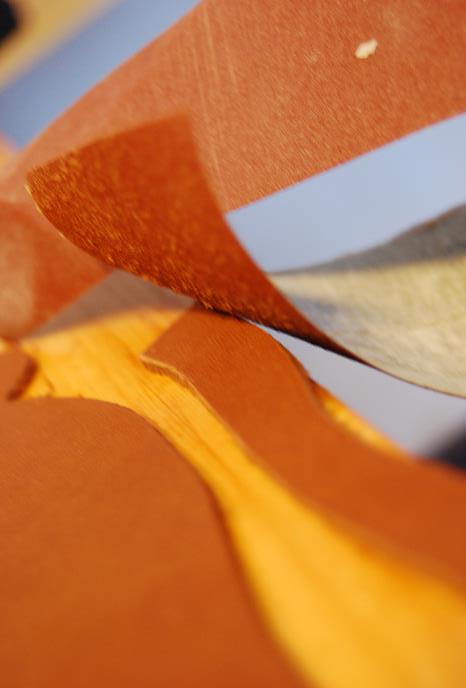
This bit is probably not needed, but I just did it this time. I sanded the sharp edges and ripples from leather’s edges resulting from my not so brilliant leather cutting efforts.
Thin the leather towards the tip of the sheath. I thinned it from the line marked by the skiver downwards. I didn’t use the skiver, but a belt sander, which can be a surprisingly good tool for this job. 2-3 minutes on it and it was done, all evenly and no signs of the leather overheating. You have lots of control over the thickness at your fingertips. I used 80 grit. Do this at your own risk. Leather, belts and grinders are different, and you will have to be very careful with them. If you have a tried and tested method for thinning leather, use it.
Holes for the seam are next. Start at the top of the sheath, on the shorter seam (the leather is asymmetrical for a sheath with the seam at the side of the blade). That’s the side that will be on the spine side of the blade. All the holes on this side will be 4.5 mm in diameter. The distance of the hole from the edge of the leather is about 2.5 mm. The first hole should be about 8-10 mm from the top edge (mouth) of the sheath.
Start off by making a few holes (up to about 2/3 of the seam) at 5 mm from each other. I do this without measuring these days, but used to measure every hole diligently.
Then mark where the last hole will be at the tip. It’s worth measuring the tip geometry altogether now, remembering the restriction that the bottom holes at the opposite sides should be around 20 mm from each other.
Then work out how to make the holes in between. Definitely worth marking them up, this time. You can use slightly different gaps and hole sizes to adjust the spacing, but probably no less than 3.5 mm for either.
One side done.
Might as well make the holes marked at the tip of the blade side seam.
Make a slightly smaller 3 mm hole for the top one on the second side, but the same spacing from the edges.
Then it’s back to 4.5 mm holes at 5 mm spacing for a few holes.
Now comes a mathematical bit – work out the spacing and sizes for the remaining holes in between. This side will have sort of T-shaped toggles, as the holes will be sliced open to the edges. The trick is to make the number of toggles match the number of holes on the other side of the leather. Each T-toggle will go through one hole. Obvious, really. But tricky for at least me to work out – and you don’t want to count it wrong…
Don’t forget to empty your hole pliers now & then. 🙂
All the holes for the seam done. As you can see, some different size holes were used on the second side, but try to keep the variation to the minimum.
Now two more holes, indicated by pencils. These are for the belt loop. The beauty of this type of loop is that it keeps the mouth of the sheath closed tight. The toggles on their own might not be enough in the long term.
Now cut the slits from each hole on the second side, forming the toggles. Pay attention at either end, to make a T-shape that will hold in a hole.
Invariably, at this stage I’ll find that the tip of my sheath is the wrong size… Here’s an attempt to save this one. The holes change the tip quite a bit, which I never remember in time.
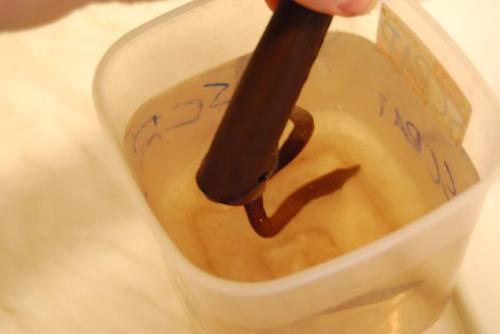
Time to wet the leather. I had this one immersed for about 2 minutes only. It’s quite a critical bit of the seam making to have the leather at the right wetness. Too wet, and it’ll be so sloppy that the toggles won’t hold in the holes. Too dry, and they won’t go in.
Ready to start ‘sewing’. Best start from the tip.
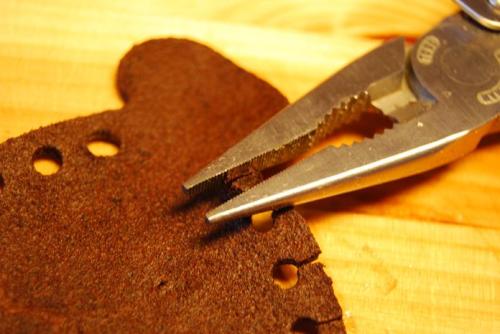
Make the first hole a bit bigger with the pliers. This will help get the toggle in, and the hole will shrink back when the leather dries. Careful not to tear the edge – been there, done that.
Fold the first toggle in two like so, with your fingers.
Then use pliers and plenty of force to compress it together.
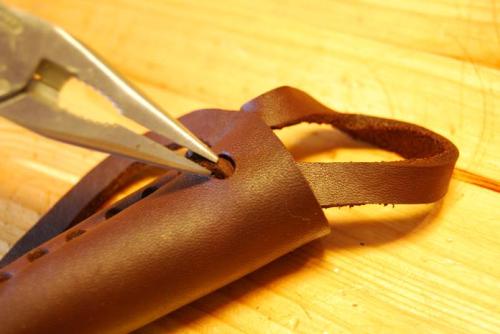
Now for the part that is the trickiest of the whole process. It can make a grown man cry. Getting the first toggle into the first hole. Thin, sharp nosed pliers help enormously. By hook or crook (or pliers), stuff the damned thing in. Note that the toggle goes into the hole from the good side of the leather, not from the flesh side.
Using the pliers initially, then the modeling tool, eventually you’ll tame the toggle. Hopefully. Once you have, straighten the toggle the best you can on the inside of the sheath, so it’ll stay in.
It’ll be tricky, and sometimes you just have to trust for it to hold, once you’ve done all you can.
The second one in the same way, this time lots easier. Phew. Straighten the toggle on the inside again, using fingers and/or pliers.
Then just carry on the same way for a while.
Once you are far enough to accommodate the blade insert, stick your finger into the sheath and stretch the sheath bigger from the inside. There will be quite a bit of scope for this. The more you can do this, the easier it will be to get the insert into where it needs to be, without destroying the seam. Also flatten the seam as best you can, so it won’t be in the way.
Now stick in the knife with the insert. You didn’t put cling film on the insert, I hope? 😉
Take the knife out, leaving the insert in the sheath. Finish up joining the toggles and holes. Hooray!
The belt loop needs our attention.
Stretch the holes a tad.
Some extra wetting of the belt loop and the holes for it will be needed. This time they can be soaking wet, but try not to wet the seam.
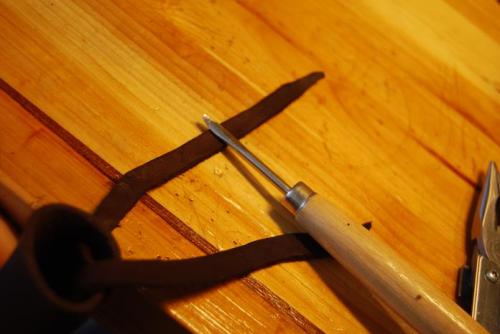
Sharpen the ends of the belt loop, and pull through the first hole, from inside out.
Like so…
The other one through from the outside in.
Nearly done!
The loop will have been squashed to within an inch of its life, so smooth it with a modeling tool or a bone. It’ll dry quickly.
Stick the knife in, adjust the tightness of the belt loops, decide how much you want to pull them in. Then lightly press into shape the belt loop area of the sheath, as well as the area around the top of the insert. This way the insert should stay in – especially if you made it a bit thicker than the bottom of the handle. I tend to press a groove at the top of the insert, to make sure.
Looks rough and ready, but it’s still wet… Now let it dry, checking occasionally that the knife will come out OK. Press the leather down if you spot any loose bits.
After 16 hours of drying and a bit of smoothing meanwhile:
Decorations were made after 2-3 hours of drying, as well as the final shaping.
Maker’s mark included:
If you got the handle shape and the sheath right, there will be a reassuring click on inserting the knife. I’m pleased to say it’s happened for me every time – probably just luck. 😉
The finished article after greasing and polishing:
Some other sheaths from along the way:
And finally, my very first attempt:












Nice! A really “how come I haven´t thought about it?”
Apropos: http://www.nb.no/nbsok/nb/1b267f4507371dcc0c51dbf19d4819ad;jsessionid=E280AE42A621320F037D6E6CC08109BD.nbdigital2?lang=en#15
– and the following page.
Good luck & keep up the good work! 🙂
Thanks Mike for putting up the tutorial. I made the first one of these seams in 2011, and yesterday I finally had confirmation on the originator’s method of working, thanks to this excellent story:
http://finnblade.blogspot.fi/2013/09/suomen-puukkosepat-osa-1-finnish.html
Thanks for the link Juha. I have contacted Ari about a follow up to your tutorial featuring Mr. Häyrinen. I think you’ll see something soon. Keep up the good work!
Reblogged this on Madidos Leather and commented:
Amazing!
excellent work, clear instructions and very nice result. I’ll have to try this!
This is brilliant, thank you! I’ve made one, success on the first try. Will make many more. I really appreciate your time and effort in putting this tutorial up.